Sunday, March 31, 2013

Warping Three.js Planes into Cubes

‹prev | My Chain | next›

Yesterday I disabused myself of the nothing that it would be easy to to manipulate vertices of a plane in order to make blocks and steps. I had hoped to use this technique in order to build Minecraft-like landscapes, but that turns out not to work.

I had originally tried a high resolution geometry to build the steps:


But I noticed a subtle sloping of the steps. I had hoped that simplifying the number of faces (from 100 to 10 in each direction) would help:
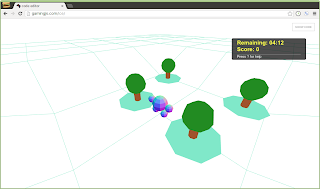


It did help. It became easier to see the confused vertices that I was causing when I tried to shift the vertices in an attempt to make the steps flat:
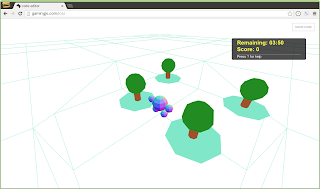


I am still not 100% clear on what is going wrong with those seemingly diagonal face edges. It occurs to me that I was headed in the right direction with simplifying the problem, but that I might need to simplify a bit more—and with a bit more deliberation.

So I break the plane into a 5 by 5 grid of faces:
  var ground = new THREE.Mesh(
    new THREE.PlaneGeometry(10000, 10000, 5, 5),
    new THREE.MeshNormalMaterial()
  );
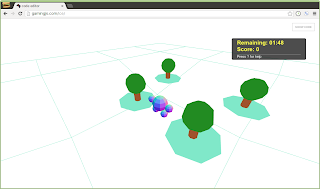
And that does the trick. When I look at the resulting wireframe, there is nowhere that I move the sunken vertices to make squares:


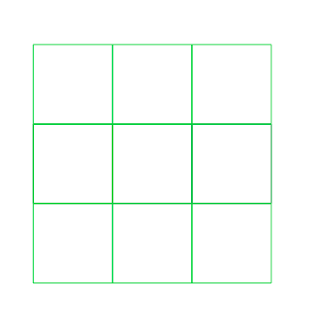
That also helps me to realize that of course this does not work. If I “unfold” the sides and bottom of a cube, it would look like:
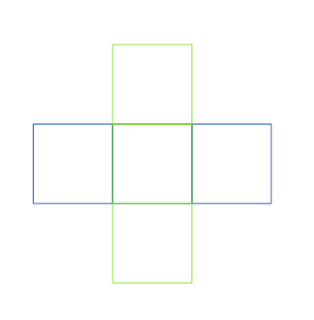


Fold that along the lines and you have a box. Unfortunately, I do not have this. I have the entire 3×3 grid and there is no way to fold just the middle squares:


Actually...

If I fold up the middle vertices, I would have a cube that also had vertices still at the corners (on the “floor”). But nothing is stopping me from moving the corner vertex up as well. Another way to build a cube would be to move the center vertices out to the edges (leaving a 1×1 square) and then pushing down the center vertices

Back in my 5×5 grid, this means shifting the third and fourth rows and columns out to the same position as the second and fifth columns:
  var faces = 5;
  var ground = new THREE.Mesh(
    new THREE.PlaneGeometry(10000, 10000, faces, faces),
    new THREE.MeshNormalMaterial()
  );
  ground.rotation.x = -Math.PI/2;
  
  var vertices = ground.geometry.vertices;
  for (var i=0; i<=faces; i++) {
    // The third row of vertices should have same Y as the second
    vertices[2*(faces+1) + i].y = vertices[1*(faces+1) + i].y;
    // The fourth row of vertices should have same Y as the fifth 
    vertices[3*(faces+1) + i].y = vertices[4*(faces+1) + i].y;

    // The third column of vertices should have same X as the second
    vertices[i*(faces+1) + 2].x = vertices[i*(faces+1) + 1].x;
    // The fourth column of vertices should have same X as the fifth
    vertices[i*(faces+1) + 3].x = vertices[i*(faces+1) + 4].x;
  }
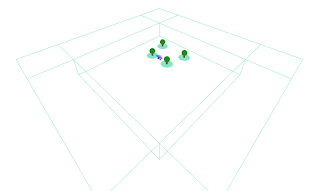
With that, I am finally able to warp a plane into a cube:


I am glad to have sussed that one out. I still lack some of the innate 3D spatial visualization that would help me understand when I am doing something silly. Hopefully this exercise will prove to be of some help with that.

There is no way that the above explanation would work in 3D Game Programming for Kids. This is not a huge deal as I had already not planned on covering this topic in the book. Still, it might be worth another day of play to see if I can tease out a better way of explaining this.

Tomorrow.

Day #708

Saturday, March 30, 2013

Warping Three.js Planes

‹prev | My Chain | next›

I think that I am more or less done with material for 3D Game Programming for Kids. While I am reviewing material, I will root through “to be answered later” pile. First up is something that I arguably should have included in the book, but have not found room: Minecraft-like vistas.

The Three.js site already links to a nice demo, but I have not tried to build it myself yet. Actually, the river rafting game that will go into the last chapter uses techniques that are similar to what should work for Minecraft terrain, but I am not sure.

Being unsure is terrain ripe for learning so...

I build a simple plane:
  var ground = new THREE.Mesh(
    new THREE.PlaneGeometry(10000, 10000, 100, 100),
    new THREE.MeshNormalMaterial()
  );
  ground.rotation.x = -Math.PI/2;
  ground.position.y = -170;
Next I work through each vertex in the plane and push it up depending on how far from the center of the plane each vertex is. In the end, this should build three step in my plane:

  for (var i=0; i<ground.geometry.vertices.length; i++) {
    vertex = ground.geometry.vertices[i];
    if (Math.abs(vertex.x) > 1500 || Math.abs(vertex.y) > 1500) {
      ground.geometry.vertices[i].z = 500;
    }
    if (Math.abs(vertex.x) > 2000 || Math.abs(vertex.y) > 2000) {
      ground.geometry.vertices[i].z = 1000;
    }
    if (Math.abs(vertex.x) > 2500 || Math.abs(vertex.y) > 2500) {
      ground.geometry.vertices[i].z = 1500;
    }
  }
  ground.geometry.computeFaceNormals();
  ground.geometry.computeVertexNormals();

This results in:


That's close, but the sides look to be slanted. This may be partially due to my used of a perspective camera, but I am pretty sure that the slant is real. To get rid of the slant, I think that, in addition to moving the vertices up, I will need to move them back. Only that does not work. The vertices placement seems to go all wonky.

I break this down into larger chunks so that I dealing with fewer faces (a simpler case):
  var ground = new THREE.Mesh(
    new THREE.PlaneGeometry(10000, 10000, 10, 10),
    new THREE.MeshNormalMaterial()
  );
  ground.rotation.x = -Math.PI/2;
  ground.position.y = -170;
  for (var i=0; i<ground.geometry.vertices.length; i++) {
    vertex = ground.geometry.vertices[i];
    if (Math.abs(vertex.x) > 1500 || Math.abs(vertex.y) > 1500) {
      vertex.z = 500;
    }
  }
Take a bird's eye view of this, I spy:


Ah, I think that the corners are looking problematic. And, indeed, when I try to move the step back in to prevent the slant:
  var ground = new THREE.Mesh(
    new THREE.PlaneGeometry(10000, 10000, 10, 10),
    new THREE.MeshNormalMaterial()
  );
  ground.rotation.x = -Math.PI/2;
  ground.position.y = -170;
  for (var i=0; i<ground.geometry.vertices.length; i++) {
    vertex = ground.geometry.vertices[i];
    if (Math.abs(vertex.x) > 1500 || Math.abs(vertex.y) > 1500) {
      vertex.z = 500;
      if (vertex.y > 0 && vertex.y - 1500 <=  1000) vertex.y -= 1000;
      else if (vertex.y < 0 && vertex.y + 1500 >= -1000) vertex.y += 1000;
      if (vertex.x > 0 && vertex.x - 1500 <=  1000) vertex.x -= 1000;
      else if (vertex.x < 0 && vertex.x + 1500 >= -1000) vertex.x += 1000;
    }
  }
Then I end up with all kinds of crazy faces:


Ugh. This may not be possible, which might explain why the the Three.js Minecraft demo uses boxes assembled from individual sides to build up the scene. Pity, that approach would have lent itself nicely for later discussion.

Day #707

Friday, March 29, 2013

Busting AppCache with Iframes

‹prev | My Chain | next›

I lost internet connectivity for a time yesterday and noticed something bothersome: many of the items from the ICE Editor's application cache did not actually seem to be in cache. After closer inspection with the network console, these items really are being fetched over the network:


All of the items in the network tab are listed in the application cache:
CACHE MANIFEST
# 2013-03-12

CACHE:
/favicon.ico
/Three.js
/Tween.js
/physi.js
/Mouse.js
/Scoreboard.js
/ChromeFixes.js
/ammo.js
/physijs_worker.js
editor.css
files/inconsolata.woff
js/editor.js
js/appcache.js
js/rawdeflate.js
js/rawinflate.js
js/ace/mode-css.js
js/ace/ace.js
js/ace/theme-chrome.js
js/ace/theme-textmate.js
js/ace/mode-html.js
js/ace/worker-javascript.js
js/ace/keybinding-emacs.js
js/ace/mode-javascript.js
If I switch over to Chrome's resources tab, I can verify that these items are, in fact, in the application cache:


So what gives?

I would guess that at least part of the problem stems from nature of the ICE Code Editor. The visualization layer resides in a separate frame from the actual code editor. The actual application cache manifest attribute is on the main page layer that holds the code editor. In the code editor, I start code with <script> tags that pull in libraries like Three.js and Physijs:
<body></body>
<script src="/Three.js"></script>
<script src="/physi.js"></script>
<script>
  // Actual code goes here...
</script>
This code is then written to a separate frame. Thus, this separate frame has its own HTML document. More importantly, the visualization layer has its own HTML document without an appcache manifest attribute that the code editor has:
<html manifest="editor.appcache">
...
I can also see this in Chrome's resources tab where the Three.js and associated libraries are linked only from the blank, visualization layer frame and not from the appcache main page:


That makes me wonder if this is not as simple as explicitly loading Three.js in the editor page even though it will not be used by that page:
<!DOCTYPE html>
<html manifest="editor.appcache">
  <head>
    <title>code editor</title>
    <!-- other libraies and CSS -->
    <script src="/Three.js"></script>
  </head>
  <body>
  </body>
</html>

And that seems to work. The Three.js library is loaded from cache (and there is no subsequent load from the server):


Unfortunately, this is not the end of my troubles. Any time that an update is made to the code, the visualization frame is destroyed and replaced with a new frame. When the new frame references script libraries, it does end up making a request to the server:


I next modify the ICE code to reuse the same iframe element (instead of removing the iframe element entirely and creating a new one):
var update = function () {
  // ...
  var iframe;
  if ( preview.children.length > 0 ) {
    iframe = preview.children[0];
  }
  else {
    iframe = document.createElement( 'iframe' );
    // ...
    preview.appendChild( iframe );
  }

  var content = iframe.contentDocument || iframe.contentWindow.document;

  content.open();
  content.write(
    '<html manifest="http://localhost:3000/editor.appcache">' +
    editor.getValue() +
    '</html>'
  );
  content.close();
};
Unfortunately, this has no effect on the behavior. The initial load of the editor and generation of the preview / visualization frame obtains Three.js from appcache, but subsequent updates to the preview result in request to the server.

The last thing that I try tonight is to grab a reference to the frame's <body> in an attempt to set the innerHTML. Let's just say that there is a reason that Mr.doob did not do this in the original code editor. Performance is atrocious, bordering on locking up my machine. This clearly will not work for a preview layer that needs to redraw after every tiny code change.

I am out of ideas to try tonight. I will sleep on it and hope for inspiration tomorrow.


Day #705

Thursday, March 28, 2013

Simple World Coordinates in Three.js

‹prev | My Chain | next›

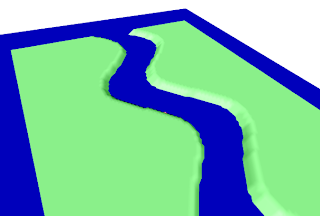
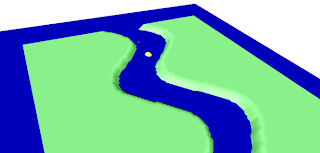
I may have painted myself into the proverbial corner with my approach to the most recent game in 3D Game Programming for Kids. I am taking readers through the building of a river scene:


Since this is the last game in the book, it is more involved than the rest. As such, I use this as a teaching moment to suggest that readers start to think about code organization. Specifically, I build the game with a series of functions:
  addSunlight(scene);
  var scoreboard = addScoreboard();
  var river = addRiver(scene);
  var raft = addRaft(scene);
  resetGame(raft, river, scoreboard);
Each of these functions has the same abstraction level—either adding or working with Three.js / Physijs objects in the game.

My original thought had been to add in-game items at the same level:
  addSunlight(scene);
  var scoreboard = addScoreboard();
  var river = addRiver(scene);
  var raft = addRaft(scene);
  resetGame(raft, river, scoreboard);
  addInGameItems(scene, river, scoreboard);
As with the other addXXX() functions, I need a reference to the scene so that the in-game items can be added to the scene. I need a reference to the river so that I know where to place the objects. I need access to the scoreboard so that I can add and subtract points as the player's raft runs into these items.

As I found last night, there are problems with this approach. The most glaring of these problems is that these in-game items really ought to be reset whenever the game resets. The second problem is that determining the world coordinates of the bonus items given river frame-of-reference coordinates may be too complex for the book. There are other approaches that don't fit as nicely with the Clean Code outline format that I might explore if I am unable to distill this down to simple code. But hopefully that will not be necessary.

But what am I thinking? Three.js has a localToWorld() method that ought to do just what I want:
  function addFruitPowerUp(location, ground) {
    var mesh = new Physijs.ConvexMesh(
      new THREE.SphereGeometry(10),
      new THREE.MeshPhongMaterial({emissive: 0xbbcc00}),
      0
    );
    mesh.receiveShadow = true;
    var p = ground.localToWorld(
      new THREE.Vector3(location.x, location.y, -20)
    );
    console.log(p);
    mesh.position.copy(p);
    scene.add(mesh);
    
    return mesh;
  }
But instead of getting the expected transform, the console.log() statement is showing:
THREE.Vector3 {x: -45, y: -170, z: -20, ...}
That ends up being below the ground since the ground is tilted. Regardless, the lack of decimal points makes it pretty obvious that no translation to world coordinates actually happened.

If I try this directly in the console, I get:
ground.localToWorld(new f.THREE.Vector3(-45, 0, -170))
THREE.Vector3 {x: -33.77378091216087, y: -166.61132156848907, z: -45.00000000000001, constructor: function, set: function…}
The difference is that, by the time I try it from the console, the scene has been rendered, the side-effect being that the ground's world coordinates have been calculated.

I could call my animate() function before adding bonus items, but it is cleaner to use Three.js's updateMatrixWorld() method directly in my current function:
  function addFruitPowerUp(location, ground) {
    var mesh = new Physijs.ConvexMesh(
      new THREE.SphereGeometry(10),
      new THREE.MeshPhongMaterial({emissive: 0xbbcc00}),
      0
    );
    mesh.receiveShadow = true;
    
    ground.updateMatrixWorld();
    var p = new THREE.Vector3(location.x, location.y, -20);
    ground.localToWorld(p);
    mesh.position.copy(p);
    scene.add(mesh);
    
    return mesh;
  }
With that, I have delicious fruit floating along the river, ready to give players bonus points:


That is actually not too bad. I had to use only three additional lines to get this to work. Unfortunately, it comes at the expense of yet another concept that I need to convey in a chapter already overloaded with concepts. Granted it could end up being a very useful one for budding 3D programmers, but I need to consider this carefully.

There no fewer than 6 dozen concepts that I am not including in 3D Game Programming for Kids. For most, someone with 3D programming experience could legitimately question my abilities as an author for not including them. Converting from local to world coordinates is just one of those. I will take a day to two before deciding if it's worth the risk of overloading readers on new concepts. But at least I know how to do it now.


Day #704

Wednesday, March 27, 2013

Bonus Points

‹prev | My Chain | next›

Up tonight, I switch back to the river rafting game that seems to be consuming more and more pages in 3D Game Programming for Kids. It has gotten so big that I think that some of it will have to be optional suggestions for game additions. One of the suggestions will be adding elements in the river that add points or remove points if the raft scoops them up.

I think that I know how to do this. I need to add the items to the river after each game reset. When the raft collides with one of these elements, I need to remove them immediately to count points and to prevent them from affecting the motion of the raft.

I start with a reset function for the bonus items, which will remove any existing items and add new ones:
  var bonus_items;
  function resetBonusItems(ground) {
    if (!bonus_items) bonus_items = [];
    removeBonusItems();
    addBonusItems(ground);
  }
I remove the items by removing them from the Three.js / Physi.js scene:
  function removeBonusItems() {
    bonus_items.forEach(function(item) {
      scene.remove(item);
    });
    bonus_items = [];    
  }
Add items is a matter of randomly grabbing the location of the fruit from the river. This is not trivial, but not too hard for a reader that has made it to this chapter in the book:
  function addBonusItems(ground) {
    var points = ground.river_points,
        number_between_90_and_100 = Math.floor(90 + 10*Math.random()),
        number_between_40_and_50 = Math.floor(40 + 10*Math.random());
    bonus_items.push(addFruitPowerUp(points[number_between_90_and_100], ground));
  }
Finally, the add fruit power-up function should look something like:
  function addFruitPowerUp(location, ground) {
    var mesh = new Physijs.ConvexMesh(
      new THREE.SphereGeometry(10),
      new THREE.MeshPhongMaterial({emissive: 0xbbcc00}),
      0
    );
    mesh.receiveShadow = true;
    mesh.position.copy(location)
    scene.add(mesh);
    
    return mesh;
  }
Except that does not work. The river points are in their own frame of reference whereas I am trying to place the fruit bonus item in world coordinates.

Dang.

I may be in trouble here. Bonus items really need to reset after each game, but I cannot add them to an already in-place Phyis.js item — once a Physi.js item is part of the scene, anything that is added to it will not register as a physical object.

My only recourse would be to manually convert from local river frame of reference to world coordinates. I know how to do that, but had meant to avoid including that in the book. Bother.

I call it a night here and will ruminate on how to best tackle this tomorrow. Shame. I really thought that I knew how to do this.

Day #703

Tuesday, March 26, 2013

Just the Abstractions

‹prev | My Chain | next›

I can simulate jumping in Three.js with Math.sin(). I can also simulate jumping with a less trigonometrically challenged (but more opaque) JavaScript function. I lean toward Math.sin() because it looks better and is easier to explain conceptually. Sines and cosines might give some flashbacks to painful high school math, but kids do not need that level of explanation in 3D Game Programming for Kids—just the abstractions.

It occurs to me that the easiest way to choose might be to implement the other proposed enhancement to my avatar world: shaking.


Specifically, I would like the tree to randomly shake. I have a list of trees already:
  var trees = [];
  trees.push(makeTreeAt( 500,  0));
  trees.push(makeTreeAt(-500,  0));
  trees.push(makeTreeAt( 750, -1000));
  trees.push(makeTreeAt(-750, -1000));
I can then randomly pick a tree, and shake it with a sine Tween:
  function shakeTree() {
    var active = Math.floor(Math.random() * trees.length);

    new TWEEN
      .Tween({jump: 0})
      .to({jump: 32*Math.PI}, 8*1000)
      .onUpdate(function () {
        trees[active].position.x = 100* Math.sin(this.jump);
      })
      .start();

    setTimeout(shakeTree, 12*1000);
  }
  shakeTree();
And that works:


So problem solved and sine and cosines it is. As I found last night one back-and-forth without trigonometry is not-great-but-not-horrible. But There is no way I can explain multiple repetitions to kids. Unless...

Unless Tween.js supports a repeat() method:
  function shakeTree() {
    var active = Math.floor(Math.random() * trees.length);

    new TWEEN
      .Tween({jump: -1})
      .to({jump: 1}, 1000)
      .repeat(10)
      .onUpdate(function () {
        trees[active].position.x = 100 * (1 - Math.abs(this.jump));
      })
      .start();

    setTimeout(shakeTree, 12*1000);
  }
  shakeTree();
Of course, Tween.js does support this method (though I have to upgrade). So I am no better off—at least not at having a decision made for me.

While digging through Tween.js, I run across one other method that I hoped would exist: removeAll(). This stops all Tweens when, for instance, the player jumps:
  function jump() {
    TWEEN.removeAll();
    new TWEEN
      .Tween({jump: 0})
      .to({jump: Math.PI}, 500)
      .onUpdate(function () {
        marker.position.y = 200* Math.sin(this.jump);
      })
      .start();
  }
Once all current Tweens are removed, I am free to start up a new one—jumping in this case. I am definitely going to need that.

I do think that I will stick with sines and cosines, but is to good to know about Tween's repeat() even if I do not use it here, I have the feeling that it will come in handy somewhere else.


Day #702

Monday, March 25, 2013

Jumping in Three.js without Physics

‹prev | My Chain | next›

I think that I am done with the game for the last chapter of 3D Game Programming for Kids. I still need to rework the first draft, but I am happy with the direction in which last night's Clean Code thought experiment pointed me. There is still much work to be done in the book—the last 10% will likely take the better part of two months to complete.

With that in mind, I return to an old friend—my favorite Three.js avatar:


I have long promised a game featuring this player and, thanks to some great suggestions, I think I have a pretty good idea what I want to do in that chapter. It involves jumping and shaking.

The problem is that, at this point in the book, I have not introduced a physics engine that would help with that. So the challenge tonight is to make this kind of motion look OK without the benefit of physics.

Luckily, I have introduced Tween.js at this point and I am already using it to animate turning the avatar. I start by adding a key event handler for the space bar, which should initiate a jump:
  document.addEventListener('keydown', function(event) {
    switch (event.keyCode) {
      // ...
      case 32: // space
        jump();
        break;
    }
  });
Sadly there is no good way to avoid keyCode, but you live by JavaScript, you die by JavaScript. Anyhow, I make a Tween in the jump() function that moves from 0 to 180°, adjusting the height of the player's frame of reference by the sine of the angle:
  function jump() {
    new TWEEN
      .Tween({jump: 0})
      .to({jump: Math.PI}, 500)
      .onUpdate(function () {
        marker.position.y = 200* Math.sin(this.jump);
      })
      .start();
  }
The result is actually fairly pleasing:


Sure, it's hard to imagine the actual motion from a snapshot, but the player does jump. This involved minimal code, but I am a bit worried about that sine. There is no way of avoiding some trigonometry in 3D programming and I do not avoid it in the book. But I cannot recall if I have introduced it at this point.

Unfortunately, the non-trigonometry alternative is usually something like:
  function jump() {
    new TWEEN
      .Tween({jump: 0})
      .to({jump: 400}, 500)
      .onUpdate(function () {
        var height = 200;
        marker.position.y = height - Math.abs(this.jump % (2*height) - height);
      })
      .start();
  }
That works, but I have to think that kids would much more readily accept Math.sin()-is-awesome rather than that beastly code. I suppose that I could reduce that to the simpler, single loop form of:
  function jump() {
    new TWEEN
      .Tween({jump: -1})
      .to({jump: 1}, 500)
      .onUpdate(function () {
        marker.position.y = 200 * (1 - Math.abs(this.jump))
      })
      .start();
  }
That is not too bad. I still rather favor the sine version—whether or not I have introduced them at this point in the book. Then again, I could take this as an opportunity to introduce absolute values. Either could work, but it is good to have choices.


Day #701

Sunday, March 24, 2013

Teaching Kids Clean Code

‹prev | My Chain | next›

As I finish the last chapter in 3D Game Programming for Kids (there still a few earlier chapters and appendices), I begin to ask myself how much about coding I really ought to be teaching kids. This is the last chapter in the book, so I feel like I ought to send them off with a few organization pointers, but it is hard to stop at a few organization pointers.

Without saying so, I am suggesting that kids might think about Clean Code organization for code. Specifically, I tell them to define functions after they are called and to keep the same abstraction layer grouped together (yeah, I'm definitely not using the term abstraction layer). For instance, in the river rafting game in this chapter, I first call all of the functions that add the components:
  addScoreboard();
  addSunlight(scene);
  addRiver(scene);
  // add raft ???
Then I have the kids define those functions below.

The functions that take scene as an argument are a little awkward. By this time in the book, I have already introduced objects and the importance of never access external "things" from objects or methods. It is nearly impossible to anticipate how much will sink in for the majority of readers, but I feel better for having done it. So passing what amounts to a global variable, scene into these functions will not be completely foreign to most readers.

The question becomes a little more difficult for the raft that will be navigating the wild river rapids in the game:


I almost feel as though I need to give the add function a signature of addRaft(scene, river, scoreboard). The raft needs to be added to the scene like the other game objects. The raft needs to have access to the river to know where the start point is in world coordinates. Finally the raft needs to be able to communicate scoring events to the scoreboard.

I could move addRaft() to be part of addRiver(). I could then rename it as addGamePieces() or something like that. The river probably needs to know about the scoreboard anyway—it probably works better for obstacles in the river to know how to add or subtract points from the current score.

The problem with this is twofold. First it is the wrong clean code abstraction. The addSunlight() method adds a single object to the scene. The proposed addGamePieces() function would be responsible for adding a myriad of things to the gameboard. The second problem is that it disrupts my narrative. I am mostly trying to hold up clean code style as analogous to writing an outline, followed by the actual essay. I do not know what kind of teachers you had in school, but mine would not have been pleased with an outline comprised of two parts: add light and then add everything else. Then again, if my teachers were Erlang aficionados maybe I would have gotten a pass.

Anyhow... I do not think that is the way to go.

This, of course, comes does to communicating state. And unfortunately, communicating state would also be ugly-ish:
  var scoreboard = addScoreboard();
  addSunlight(scene);
  var river = addRiver(scene);
  addRaft(scene, river, scoreboard);
This just looks awkward. Keeping a reference to scoreboard and to river interrupt the more obvious outline analogy that I was hoping to use.

In the end, I fall back on another lesson from Clean Code. Functions should do one thing. My proposed addRaft() would need access to three variables because it was doing too much. It was creating the raft, positioning in the right place relative to the river, and attaching events to the scoreboard. And really, positioning the raft in the right starting point is something that I might want to re-use to enable game resetting. Which gives me this idea:
  addSunlight(scene);
  var scoreboard = addScoreboard();
  var river = addRiver(scene);
  var raft = addRaft(scene);
  resetGame(raft, river, scoreboard);
Sure, I traded one function that took three arguments for another that takes three arguments, but I think I have the abstraction levels right (or closer to right) with this approach. The raft, like all of the other game objects, is created and added to the scene with the new addRaft() function. Adding the raft is the only purpose of addRaft(). It is then the job of resetGame() to position all of the game objects properly (the raft include) for the start of a game.

This may not be perfect Clean Code, but it is clean enough as a send-off for kids. I only want new programmers to start thinking about these things. Hopefully this will suffice.


Day #700

Saturday, March 23, 2013

Simple Game Scoring

‹prev | My Chain | next›

Up today, I hope to introduce some simple scoring into the river rafting game in 3D Game Programming for Kids.

For starters, I want to increase the score simply for progressing through the game. This should do the trick:
  var next_x;
  function updateScore() {
    if (!next_x) next_x = raft.position.x + 25;
    if (raft.position.x > next_x) {
      scoreboard.score(scoreboard.getScore() + 10);
      next_x = next_x + 25;
    }
  }
This should defeat the gamer trying to retrace their steps to score points for crossing the same marker multiple points. I do need to clean up that scoreboard API a bit. Well, not so much clean up as add an addPoints() method.

That actually seems to work. Next up, bonus points for reaching the end of the game. If the player reaches the finish line in under 30 seconds, then the player should get 100 extra points. If the player reaches the finish line faster, those points should increase. I try this in my gameStep() loop:
  function gameStep() {
    if (!paused) scene.simulate(2/60, 2);
    // Finish line
    if (raft.position.x > 250) {
      paused = true;
      scoreboard.stopTimer();
      if (scoreboard.getTime() < 20) scoreboard.score(scoreboard.getScore() + 500);
      if (scoreboard.getTime() < 25) scoreboard.score(scoreboard.getScore() + 250);
      if (scoreboard.getTime() < 30) scoreboard.score(scoreboard.getScore() + 100);
    }
    // ...    
    // Update physics 60 times a second so that motion is smooth
    setTimeout(gameStep, 1000/60);
  }
I wind up with two problems here. First, the scoreboard timer continues to update. This turns out to be a bug in the scoreboard itself. I set a private variable whenever stopTimer() is called. The problem is that nothing in the above condition is halting the gameStep() loop—even when the game is over. This calls scoreboard.stopTimer() repeatedly, which continues to update that private variable in scoreboard. The end result is that the scoreboard timer is stopped and started dozens of times a second and effectively keeps the scoreboard timer running. The fix for that is to check for that private variable in scoreboard before setting it.

But that still leaves me with a problem with time bonus scores. Just as the timer is repeatedly called, so are the added scores, which leads to rapidly increasing scores when the game is over. Again the solution is easy enough—I need to introduce a game_over variable:
  var game_over = false;
  function gameStep() {
    if (game_over) return;
    if (!paused) scene.simulate(2/60, 2);
    if (raft.position.x > 250) {
      paused = true;
      scoreboard.stopTimer();
      if (scoreboard.getTime() < 20) scoreboard.score(scoreboard.getScore() + 500);
      if (scoreboard.getTime() < 25) scoreboard.score(scoreboard.getScore() + 250);
      if (scoreboard.getTime() < 30) scoreboard.score(scoreboard.getScore() + 100);
      game_over = true;
    }

    // Update physics 60 times a second so that motion is smooth
    setTimeout(gameStep, 1000/60);
  }

With that, I have my simple scoring working:


I need to add ways to lose points (and the game). I also need to add a method or two to the scoreboard. But this is a good start.


Day #699

Friday, March 22, 2013

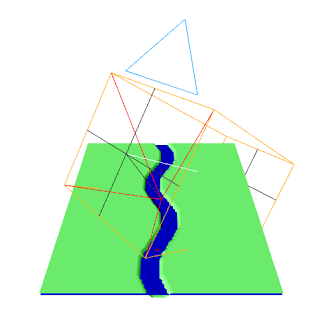
Three.js Directional Light Shadow Boxes

‹prev | My Chain | next›

I think that I am closing in on understanding light in Three.js. I have been working with DirectionalLight, which I had expected to behave like the Sun—light rays from both should be parallel no matter where you move around. What I had not understood was the importance of the “shadow box”—the box inside which shadows are rendered. I also failed to grasp the various properties of shadow box. Tonight, I hope to rectify the situation.

From previous experience in other environments, I expect that there is not an origin point for directional light. The x, y, and z coordinates supplied to a directional light describe the direction of the light. For instance, light at (1, 1, 1) would be coming from the right, up, and in front of the scene. It would be exactly the same thing to have a directional light from (100, 100, 100). The light would still be coming from equal parts to the right, up, and in front of the scene.

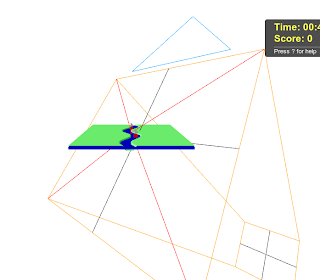
Anyhow, that I understood. What I did not was the shadow box. Until yesterday, I had not even realized that the shadow box bounded the portion of the scene in which shadows would occur (I assumed that shadows would be everywhere). Even then, I had trouble understanding how the shadow box got positioned. Three.js includes a debugging property for lights, shadowCameraVisible that helps:


The problem with this shadow box is that it only encompasses half of my river game (the camera is rotated to get better view). I am not concerned about shadows on the grass, but it would look odd for shadows to come and go as the raft makes its way down the winding river.

What I need to do is shift the light's shadowCameraNear property back around 250 (the entire river and grass is 500 by 500). Instead of doing that, I can shift the origin of the light back to (250, 250, 250):
    var sunlight = new THREE.DirectionalLight();
    sunlight.position.set(250, 250, 250);
This does not change the direction of the directional light—it still comes from equal parts to the right, up and in front (again, it does not look like it because the camera was rotated). What this does give me is the ability to say that the shadowCameraNear property, which describes the distance from the light's position to the closest face of the shadow box, should be about 250. The opposite side, shadowCameraFar, should be 600 away from the light's position. This makes the thickness of the shadow box around 350, which ought to be sufficient to encompass the river.

Those two properties, along with other dimensions of the box can tightly positioned around the river with:
    var sunlight = new THREE.DirectionalLight();
    sunlight.position.set(250, 250, 250);
    sunlight.intensity = 0.5;
    sunlight.castShadow = true;
    sunlight.shadowCameraVisible = true;
    sunlight.shadowCameraNear = 250;
    sunlight.shadowCameraFar = 600;
    sunlight.shadowCameraLeft = -200;
    sunlight.shadowCameraRight = 200;
    sunlight.shadowCameraTop = 200;
    sunlight.shadowCameraBottom = -200;
The result is a pretty nice looking shadow box:


When I zoom in on the raft doing sweet jumps over sharks, I am not at all rewarded for my efforts. The shadows are barely visible:


It turns out that I need to set two more properties if I want nicely defined shadows: shadowMapWidth and shadowMapHeight. Both describe the resolution of the texture used to draw the shadows. The default of 512 for both is too small for my needs. After a bit of experimentation, I settle for 2048 for both:
  function addSunlight(scene) {
    var sunlight = new THREE.DirectionalLight();
    sunlight.position.set(250, 250, 250);
    sunlight.intensity = 0.5;
    sunlight.castShadow = true;
    sunlight.shadowDarkness = 0.9;
    sunlight.shadowMapWidth = sunlight.shadowMapHeight = 2048;
    sunlight.shadowCameraNear = 250;
    sunlight.shadowCameraFar = 600;
    sunlight.shadowCameraLeft = -200;
    sunlight.shadowCameraRight = 200;
    sunlight.shadowCameraTop = 200;
    sunlight.shadowCameraBottom = -200;

    scene.add(sunlight);
  }
Now I see nicely defined shadows—both under the raft and from the sides of the river:


It is unfortunate that so much code is required to describe sunlight. I think that I could get away with some it in 3D Game Programming for Kids. Things like castShadow are obvious. The purpose of intensity and shadowDarkeness are similarly easy (and also eminently play-able).

The position is a little trickier. Calling it the start point of a ray that will be parallel to all other light rays is a tough thing to understand. Much less would be a disservice to readers that might want to use directional lights in the future. I believe that I could make slightly better high-level descriptions of the various shadowCameraXxx properties. Mostly, it is a shame that so many lines need to be typed in a book that must treat code length as a premium.

Still, it is likely worth the cost. Those shadows really are nice.


Day #698

Thursday, March 21, 2013

Scaling Land to Fit the Three.js Sun

‹prev | My Chain | next›

After all this time, I still do not quite understand lighting in Three.js. I would like to have sunlight shining down on my awesome river landscape:


The problem is that I have made my river rafting world much larger than the normal DirectionalLight in Three.js. I made the land 5000 by 5000:

  var ground = makeGround(5000);
  // ...
  function makeGround(size) {
    var faces = 100;
    var shape = new THREE.PlaneGeometry(size, size, faces, faces);
    var cover = Physijs.createMaterial(new THREE.MeshPhongMaterial(), 1, 0.1);
    // ...
    var ground = new Physijs.HeightfieldMesh(
      shape, cover, 0
    );
    // ...
  }
If I add a directional light that is equal parts offset in the x, y, and z directions, I get shadows in the scene. But the shadows are only visible in the middle of the river. For much of the beginning part of the journey and much of the end, there are no shadows.

Three.js includes a debugging mechanism for figuring out the shape of lights. So I enable it with the shadowCameraVisible property:
  function addSunlight(scene) {
    var sunlight = new THREE.DirectionalLight();
    sunlight.intensity = 0.5;
    sunlight.castShadow = true;
    sunlight.position.set(1, 1, 1);
    sunlight.shadowCameraVisible = true;
    scene.add(sunlight);
  }
I manually position the camera well away from land to find:


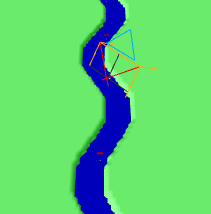
The red “X” marks the orientation of the light source. The yellow box signifies the extent of the shadow making region of the light. In other words: source of the mystery found. My code will only produce shadows in the very center of the game.

To make the shadow box larger, I fiddle with parameters available on DirectionalLight:
  function addSunlight(scene) {
    var sunlight = new THREE.DirectionalLight();
    sunlight.intensity = 0.5;
    sunlight.castShadow = true;
    sunlight.shadowCameraLeft = -1500;
    sunlight.shadowCameraRight = 1500;
    sunlight.shadowCameraTop = 2500;
    sunlight.shadowCameraNear = -2000;
    sunlight.position.set(1, 1, 1);
    sunlight.shadowCameraVisible = true;
    scene.add(sunlight);
  }
This makes for a nice improvement in the shadow casting area of my “Sun” directional light source:


Although it occurs to me. Perhaps I am taking the wrong approach. Instead of making light bigger, perhaps it is easier to scale down everything else. There must be a reason that DirectionalLight defaults to the size that it does.

After removing the shadow box size properties from the sunlight and scaling the playing area down, I am left with this:


I think this is probably the way to go. The overall effect in the game is still not quite right, so I will probably come back to this tomorrow to see if there are some other settings in need of tweaking. But, so far so good with the scaled down approach.


Day #697

Wednesday, March 20, 2013

Pausing Physics

‹prev | My Chain | next›

Tonight I hope to figure out how to pause Physijs physics. Pausing Three.js animation is simple enough—a guard clause before rendering does the trick:
  var paused = false;
  function animate() {
    requestAnimationFrame(animate);
    if (paused) return;
    // ...
    renderer.render(scene, camera);
  }
  animate();
Something similar seems to work for Physijs:
  // Run physics
  function gameStep() {
    if (!paused) scene.simulate();
    // Update physics 60 times a second so that motion is smooth
    setTimeout(gameStep, 1000/60);
  }
  gameStep();
The CPU's load definitely goes down in response to this, so it would seem as though this helps. The problem is that, upon “un-pause”, the game jumps ahead as if it had been simulating things all along.

I am not quite sure how this happens since the CPU load become negligible when paused. There is a web worker involved in Physijs simulation, but if it were actively working, I would expect the CPU to remain high. My best guess is that Physijs maintains an internal last-updated-physics date and, upon restart it applies physics for the interim. I'm probably completely wrong, but it is a working theory.

And unfortunately, this turns out to be a good working theory. There is a last_simulation_time stored in the worker. Sadly, try as I might, I cannot figure a way to get it to reset or slow down. So I fall back on what I know best: cheating.

I only have one thing moving in the current game, so in addition to pausing animation and not calling scene.simulate(), I also manually stop the raft by setting its mass to zero:
  var mass, velocity;
  document.addEventListener("keydown", function(event) {
    var code = event.which || event.keyCode;
    // ...
    if (code == 80)  { // P
      paused = !paused;
      if (paused) {
        mass = raft.mass;
        velocity = raft.getLinearVelocity();
        raft.mass=0;
      }
      else {
        raft.mass = mass;
        raft.setLinearVelocity(velocity);
      }
    }
  });
It may not be perfect, but it works. By setting the mass to zero, I effectively take it out of Pysijs' simulation. I squirrel the old mass and current velocity away so that, once the game is unpaused, these values can be restored and the game can proceed as desired.

This is not a great solution for a game or simulation with a ton of objects in motion, but it will suffice for my needs.

Day #696

Tuesday, March 19, 2013

Shark Jumping

‹prev | My Chain | next›

I think that I have the big questions answered for the rafting game that I would like to include in 3D Game Programming for Kids. As with everything else in the book, it is a Three.js / Physijs game. The biggest question—how to build the river—was answered by a Physijs-specific feature (height fields). For the most part, I try to stick to “purer” 3D constructs, but this wins for simplicity of implementation and concept. But just because the big question is answered does not mean that everything is easy from here on in. So...

I am going to add obstacles in the river to prevent the player from easily navigating to the end. From last night, I can already add a single ramp:
var ramp = new Physijs.ConvexMesh(
      new THREE.CubeGeometry(100, 100, 300),
      new THREE.MeshBasicMaterial({color: 0xbb0000})
    );
    ramp.rotation.x = Math.PI/4;
    ramp.position.copy(pos);
    ground.add(ramp);
Tonight, I convert that to a function:
 function addSharkJump(pos) {
    var ramp = new Physijs.ConvexMesh(
      new THREE.CubeGeometry(100, 100, 300),
      new THREE.MeshBasicMaterial({color: 0xbb0000})
    );
    ramp.rotation.x = Math.PI/4;
    ramp.position.copy(pos);
    ground.add(ramp);
And randomly place these ramps somewhere in the middle of the river:
  var number_between_20_and_40 = 12, // Math.floor(20 + 20*Math.random()),
      number_between_60_and_80 = Math.floor(60 + 20*Math.random());
  addSharkJump(middle_river_points[number_between_20_and_40]);
  addSharkJump(middle_river_points[number_between_60_and_80]);
I am not 100% sold on the idea that this is the best way for kids to randomize the location of ramps. They will already have seen random numbers and floor at this point, so this is not terrible. Still, I hope to come up with better for the actual book.

Anyhow, I need the obstacle:
  function addSharkJump(pos) {
    // ...
    var shark = new Physijs.ConvexMesh(
      new THREE.CylinderGeometry(1, 10, 20),
      new THREE.MeshBasicMaterial({color: 0x999999})
    );
    shark.position.copy(pos);
    shark.rotation.x = Math.PI/2;
    shark.rotation.z = Math.PI/10;
    shark.position.z = pos.z + 140;
    shark.position.y = pos.y - 200;
    ground.add(shark);
  }
It is not a perfect looking shark, but it is something that kids can easily build:


The last thing I need is a penalty for actually hitting the shark:

  function addSharkJump(pos) {
    // ...
    shark.addEventListener('collision', function() {
      scoreboard.addTime(10);
    });
  }
With that, I have obstacles that penalize the player. This is a good stopping point for tonight. Up tomorrow: power-up items that decrease the timer.


Day #695

Monday, March 18, 2013

Rex Kwan Do Physics

‹prev | My Chain | next›

With the end of the month fast approaching and 3D Game Programming for Kids deadlines looming, it is time to make smaller offerings to the gods of the chain so that I can focus on book writing. There still remain a few outstanding questions over approach to the last game in the book. Hopefully I can answer them in the next few days.

Tonight, I start with how to penalize a player that somehow jumps the banks of the river:


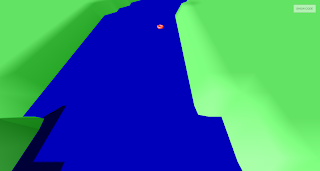
I had hoped to make the friction of the “grass” so high that the raft would come to an immediate stop. It turns out to be tricky to get the numbers just right so that the raft has no friction on the river water, but lots of friction on the grass. Also, if the player times it just right, it is possible to build enough speed to jump the entire length of the river.

So instead of playing a losing numbers game, I add an invisible lid to the game:
  var lid = new Physijs.ConvexMesh(
    new THREE.CubeGeometry(size, size, 10),
    new THREE.MeshBasicMaterial({visible:false})
  );
  ground.add(lid);
  scene.add(ground);
With that, a player that happens to bounce out gets forced right back down.

The other thing that I would like to do tonight it to add ramps to the river so that players can do sweet jumps. I am using Physijs height fields for the ground depression that forms the river. While I am building that, I collection the middle points of the river:
  var shape = new THREE.PlaneGeometry(size, size, faces, faces);
  var cover = Physijs.createMaterial(new THREE.MeshPhongMaterial(), 1, 0.1);

  // Doing vertices here, which is faces+1
  var row_size = faces+1;
  var middle_river_points = [];
  for (var i=0; i<row_size; i++) {
    var center = Math.sin(4*Math.PI*i/row_size);
    center = center * 0.05 * faces;
    center = Math.floor(center + faces/2);
    middle_river_points.push(shape.vertices[i*row_size + center]);
    // Make depression here...
  }
With that, I can copy the position of arbitrary points along the river to place ramps:
  var ramp = new Physijs.ConvexMesh(
    new THREE.CubeGeometry(50, 100, 300),
    new THREE.MeshBasicMaterial({color: 0xbb0000})
  );
  ramp.rotation.x = Math.PI/4;
  ramp.position.copy(middle_river_points[10]);
  ground.add(ramp);
Just like that, I have a sweet jump over which I can get like three feet of air:


And, happily, the invisible lid seems high enough that jumping is not affected. In the next couple of days, I need to add obstacles that slow the player down and speed it up. I also need to add an end game. I think I have the hardest questions answered already, but the devil is always in the details. So who knows what adventures tomorrow brings?


Day #694

Sunday, March 17, 2013

Keeping it Simple… By Cheating Physics

‹prev | My Chain | next›

Writing a book for kids has made me acutely aware of the need to limit both code and concepts when writing. Limiting code and concepts is one of those things that I have always unconsciously tried to do, but now I see it has to be a priority—something that I always have to keep in the forefront. In fact, I have gotten quite obsessive about it, to the point that I will completely delete and restart chapters if need be.

In the case of the last chapter in 3D Game Programming for Kids, I have restrained from even starting the chapter for several months because I was unable to limit either code or concepts with the various approaches that I was trying. That was until Chandler Prall happened to mention Physijs height fields in response to one of my failed attempts at building a river.

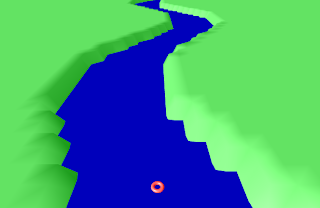
After mucking with height fields for a few nights, I have a very satisfactory looking river:


Even better, I made that with 40 lines of code (river trench, water, shading and shadows). Best of all, the concept of a height field is ridiculously simple—make parts of it lower than the rest.

I am still left with the challenge of explaining the nice sine curve that is the river, but that is not hopeless. I need only state that sines and cosine make winding graphs—without actually mentioning their geometric origin. Or I could opt for an even simpler zig-zag river. Regardless, I think that I am ready to proceed with the game.

For the game, I need to solve three more (hopefully) smaller issues. The first is that the camera needs to point well in front of the player's raft so that the player can see what is coming next. Second, the river has to push the raft downstream. Last, I need a way to keep the raft right-side-up—the controls get tricky when the raft flips.

Positioning the camera turns out to be trickier than I had expected. I am using an older version of Three.js (r52) in which the Vector3 class does not support the add(vector) method. Back then, add() added two vectors together and set the current vector to the result. More recent versions of Three.js have made the switch to add(v) producing a new vector from the sums of the current object and v. I am stuck with the old addSelf():
  camera.lookAt(
    donut.position.addSelf(new THREE.Vector3(0.67*height, 0, 0))
  );
The value of 0.67*height (67% the height of the viewport) was chosen through trial and error after positioning the camera with:
  function updateCamera() {
    camera.position.set(
      donut.position.x + 0.75 * height,
      0.1*height,
      donut.position.z
    );
  }
  updateCamera();
This gives the player a reasonable view of what is coming downstream of the raft's current position:


The original idea that I have for the current is to make the water zero friction (the zero in the Phsyijs.createMaterial function):
  var water = new Physijs.ConvexMesh(
    new THREE.CubeGeometry(size, size, 10),
    Physijs.createMaterial(
      new THREE.MeshBasicMaterial({color: 0x0000bb}),
      0,
      0.9
    ),
    0
  );
And then apply a force downstream whenever there is a collision:
  water.addEventListener('collision', function(event) {
    donut.applyCentralForce(
      new THREE.Vector3(1e7, 0, 1e7)
    );
  });
This does not quite work, however. The raft is pushed into the river bank, bounces backward, and eventually falls off the edge of the “world”. I need the initial push to be off to the right a bit. I also need subsequent water force to continue pushing as long as the raft and river are in contact.

The initial motion is easy enough:
  donut.setLinearVelocity(
    new THREE.Vector3(50, 0, -10)
  );
As a side-note, I really need to stop calling this a “donut”. Anyhow...

Whether or not an object is currently colliding with another object is not an easy thing to do in Physijs. In fact, I need to reach under the covers to ask how many objects are currently “touching”:
  setInterval(function() {  
    if (water._physijs.touches.length > 0) {
      donut.applyCentralForce(
        new THREE.Vector3(1e6, 0, 10)
      );
    }
  }, 1000);
That works—the donut/raft is pushed downstream—but it probably violates my concept rule.

It is probably easier to fake current by tilting the ground ever so slightly:
  ground.rotation.y = 0.1;
That involves motion down an incline plane, which is fun for every first year physics student. But I would not need to explain the trigonometry behind the forces. Rather, I can state that things slide down a ramp, which is a concept that kids understand.

Last up, I need to stop the raft from wobbling when to bumps into the water or the sides. Happily, by this point in the book, readers are well familiar with setAngularFactor(). This Physijs method restricts or limits rotational motion around one or all axes. In this case, the easiest thing to do is to prevent rotation entirely:
  var donut = new Physijs.ConvexMesh(shape, cover);
  donut.rotation.x = -Math.PI/2;
  donut.position.set(-2500, 200, 0);
  scene.add(donut);
  donut.castShadow = true;
  donut.setLinearVelocity(
    new THREE.Vector3(50, 0, -10)
  );
  donut.setAngularFactor(new THREE.Vector3(0, 0, 0));
It is a little odd to see the raft/donut bounce completely level, but the simplification in game play makes this a good option.

With that, I can navigate to the end of the river (and the world):


Clearly, the end of the world can use some gussying up. I also need to add a timer and some river obstacles. I think I have a handle on most of that. Hopefully this means that I can finish off this game tomorrow.


Day #693

Saturday, March 16, 2013

Drawing Patterns in Physijs Height Fields

‹prev | My Chain | next›


The Physijs HeightField with which I have been playing for the past few days seems quite promising. It may be too complicated to include in 3D Game Programming for Kids. Still, the landscapes that it makes are quite nice:


Today, I would like to see how I might changed those parallel “rivers” into a single, winding river. I do not believe that it will be easy. Height fields work on the vertices of shapes. If I have a 900×900 plane that I divide into a 3×3 grid, then I have 9 faces (300×300 each) and 16 vertices:


To make a winding depression in that, I would want vertices 1, 6, 9 and 14 lower than the rest. Let's see how that looks in Three.js.

A Three.js plane is constructed with the width and height as the first two constructor parameters. The second two parameters are the number of faces in each dimension. To replicate the above grid, I want:
  var shape = new THREE.PlaneGeometry(900, 900, 3, 3);
Then, to lower grid points 1, 6, 9, and 14, I do the following:
  var shape = new THREE.PlaneGeometry(900, 900, 3, 3);
  var cover = new THREE.MeshPhongMaterial();
  cover.emissive.setRGB(0.1, 0.6, 0.1);
  cover.specular.setRGB(0.2, 0.2, 0.2);

  shape.vertices[1].z = -100;
  shape.vertices[6].z = -100;
  shape.vertices[9].z = -100;
  shape.vertices[14].z = -100;
  shape.computeFaceNormals();
  shape.computeVertexNormals();

  var ground = new Physijs.HeightfieldMesh(
    shape, cover, 0
  );
I then insert a water plane below the surface of the ground, but above the -100 depressions. The result is:


As proof of concepts go, that is actually not too bad. Clearly it is not a winding river. Height fields do not join depressions quite as ruthlessly as I might like. Still, I got the vertices right.

What I need is more faces to make a smoother transition from vertex to vertex. So I swap back to a large plane with 100 faces in both dimensions:
var size = 5000,
      faces = 100;
  var shape = new THREE.PlaneGeometry(size, size, faces, faces);
Since vertices is a one dimensional array, I need to move through it one row at a time. That means a for-loop incrementing the index variable from 0 to the number of vertices in a row:
  // Doing vertices here, which is faces+1
  var row_size = faces+1;
  for (var i=0; i<row_size; i++) {
    // manipulate the height map here...
  }
Now, I need to manipulate the nature of the winding river. For the frequency that the river undulates, I opt for 2 full sine waves, 4*Math.PI. For the amplitude, I use 0.05 times the number of faces (5% of the total faces in each row). Last, I have to offset the winding to the middle of each row. This all looks like:

  var row_size = faces+1;
  for (var i=0; i<row_size; i++) {
    var j = Math.sin(4*Math.PI*i/row_size);
    j = j * 0.05 * faces;
    j = Math.floor(j + faces/2);
    // manipulate height map here...
  }
With that, all that is left is to create the depression for the river. I do this on the vertex that I found above and two vertices on either side for better effect:
  var row_size = faces+1;
  for (var i=0; i<row_size; i++) {
    var j = Math.sin(4*Math.PI*i/row_size);
    j = j * 0.05 * faces;
    j = Math.floor(j + faces/2);
    shape.vertices[i*(row_size) + j-2].z = -50;
    shape.vertices[i*(row_size) + j-1].z = -90;
    shape.vertices[i*(row_size) + j].z   = -100;
    shape.vertices[i*(row_size) + j+1].z = -90;
    shape.vertices[i*(row_size) + j+2].z = -50;
  }
  shape.computeFaceNormals();
  shape.computeVertexNormals();
I also remember to recompute the normals so that Three.js can do the shading right. With that, I have a nice, winding river:


Best of all, if I move my raft into the river (and point the camera at it), then it interacts well with both the river and the height field ground:


The banks of the river are a little blocky, but, in a 3D-computer-kind-of-way, that is not horrible.

I am a little worried about explaining that for-loop to kids. The mapping of the one dimensional array into two dimensions seems tricky. Especially since the two dimensions are array space that happen to map into coordinate space. That said, this is far easier than some of the river segment solutions that I had previously explored. And it looks nicer. Definitely worth exploring a bit more.

(live code of the river)


Day #692

Friday, March 15, 2013

Playing Nice with Physijs Height Fields

‹prev | My Chain | next›

Up today I would like build on my Physijs height field work from yesterday. I still do not know if they will make a good fit for 3D Game Programming for Kids, but they are interesting enough to warrant another play date.

I have a simple, wavy height field for my donut / raft to play in:


I would like to see if I can add a material that is a bit more realistic. I would also like to see if I can add Physijs material in between the waves so that the bottom of the waves are covered. I start with the latter because I am curious to see if I can “dig” out a trench in a height field mesh to make a river—a key component in the last game that I want in the book.

So I add water:
  var water = new Physijs.ConvexMesh(
    new THREE.PlaneGeometry(1000, 1000),
    new THREE.MeshBasicMaterial({color: 0x0000bb})
  );
  water.rotation.x = -Math.PI/2;
  water.position.y = -100;
  water.receiveShadow = true;
  scene.add(water);
And it just works:


The other thing that I hope to understand tonight is why my hills are a little dull. On the one hand, they are grassy hills—it is not as if they should be very shiny. On the other hand, there should be a little shading given that the material used is a MeshPhongMaterial:
  var shape = new THREE.PlaneGeometry(1000, 1000, 100, 100);
  var cover = new THREE.MeshPhongMaterial();
  cover.emissive.setRGB(0.1, 0.6, 0.1);
  cover.specular.setRGB(0.2, 0.2, 0.2);
  // ...
  var ground = new Physijs.HeightfieldMesh(
    shape, cover, 0
  );
My problem turns out to be in the elided code which sets the height field's height:
  for (var i=0; i<shape.vertices.length; i++) {
    var vertex = shape.vertices[i];
    vertex.z = 25 * Math.cos(vertex.x/40);
  }
After mucking with the vertices height like this, I need to tell Three.js to recompute normals:
  for (var i=0; i<shape.vertices.length; i++) {
    var vertex = shape.vertices[i];
    vertex.z = 25 * Math.cos(vertex.x/40);
  }
  shape.computeFaceNormals();
  shape.computeVertexNormals();
And, just like that, I have some decent shading on my hills:


These height maps definitely seem promising. Up tomorrow, I will see if I can figure out how to dig winding paths through them. The nature of the shape vertices makes this seem like a non-trivial problem. If I can solve it, then I just might have the setting for the river rafting game in the last chapter.


Day #691

Thursday, March 14, 2013

Physijs HeightField

‹prev | My Chain | next›

According to my little tag cloud, I have written 48 posts on Physijs. In all those posts and all the research necessary for them, I somehow managed to never come across the HeightField class in the list of supported objects. Thankfully Chandler Prall made mention of them, so now I at least know of their existence. I have absolutely no idea if they will be of any use to me in 3D Game Programming for Kids. There is no way to know unless I take at least a little time to play.

Before I get started, it is worth noting that there is a nifty sample page for HeightField on the physijs site.

I have a simple lights an materials chapter in the book that takes the reader though creating a donut and shadow (and eventually animation):
  var shape = new THREE.TorusGeometry(100, 50, 8, 20);
  var cover = new THREE.MeshPhongMaterial();
  cover.emissive.setRGB(0.8, 0.1, 0.1);
  cover.specular.setRGB(0.9, 0.9, 0.9);
  var donut = new THREE.Mesh(shape, cover);
  scene.add(donut);
  donut.castShadow = true;

  var shape = new THREE.PlaneGeometry(1000, 1000);
  var cover = new THREE.MeshBasicMaterial();
  var ground = new THREE.Mesh(shape, cover);
  ground.position.set(0, -200, 0);
  ground.rotation.set(-Math.PI/2, 0, 0);
  ground.receiveShadow = true;
  scene.add(ground);
A light source and renderer tweaks result in:


To get started with HeightField, I replace the ground that is created from a THREE.Mesh to a Physijs.HieghtField:
  var shape = new THREE.PlaneGeometry(1000, 1000);
  var cover = new THREE.MeshBasicMaterial();
  var ground = new Physijs.HeightfieldMesh(
    shape, cover, 0
  );
  // ...
After making that change, nothing happens. More precisely, nothing changes on the screen—I still have my donut casting a shadow. At least I have not broken anything.

To get height in my height field, I need to change the z value of the vertices in the ground. To achieve smooth bumps in the height field, I divide up the geometry shape into a 50 by 50 grid. Then I work through each vertex in the resultant shape, setting the z value to the cosine of the x position:
  for (var i=0; i<shape.vertices.length; i++) {
    var vertex = shape.vertices[i];
    vertex.z = 10 * Math.cos(vertex.x);
  }
The result is a pretty cool ripple effect in the ground:


So, of course I make that into rolling hills and add controls to the donut to speed about:


Good times.

These height field objects are definitely pretty cool. I am still not sure if I have a good use for them in the book, but I will let the idea percolate for a while. Hopefully I can come up with something...


Day #690