Saturday, May 31, 2014

The Unfortunate Case of the Annotation and Polymer Testing


OK. Today I test model driven attributes in a Dart Polymer element.

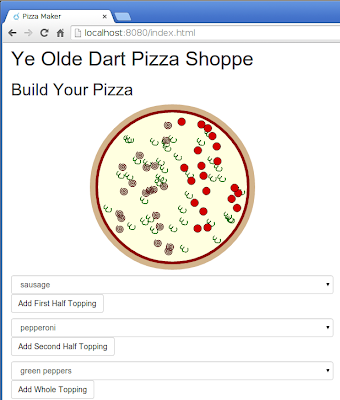
I was able to update the attributes in the pizza-building <x-pizza> element yesterday:


I can now set toppings and query them on the various toppings attributes that I added to the Polymer element. And it was quite easy. What was surprisingly difficult was testing the darn thing.

Actually, it was not testing the Polymer element that was the problem. It was testing in general. I have not one, but two approaches to Dart testing in Patterns in Polymer. One is more of a straight unit testing solution largely based on the current stable 0.9 Polymer.dart release. The other is a page objects solution that I based on the unstable 0.10 release. Neither seems to be working for me—at least not without some changes.

It sounds as though the initialization in the unstable 0.10 release, which had changed fairly significantly, is again changing back to something closer to the 0.9 initialization process. So I am going to stick with the stable Polymer.dart (currently 0.9.5+2) in my pubspec.yaml:
name: svg_example
dependencies:
  polymer: any
  polymer_elements: any
dev_dependencies:
  scheduled_test: any
transformers:
- polymer:
    entry_points: web/index.html
To get unstable, I would need to change the “any” dependency constraint to something like: ">=0.10.0-pre".

The HTML page that serves as the testing context is fairly simple in 0.9—it need only load my Polymer component definition and the tests:
<head>
  <!-- Load component(s) -->
  <link rel="import" href="packages/svg_example/elements/x-pizza.html">

  <!-- The actual tests -->
  <script type="application/dart" src="test.dart"></script>
</head>
My test.dart file does the usual initPolymer() inside of the main() entry point to kick things off:
library x_pizza_test;

import 'dart:html';
import 'dart:async';
import 'dart:convert';
import 'package:polymer/polymer.dart';
import 'package:scheduled_test/scheduled_test.dart';

@initMethod
main() {
  initPolymer();

  // Actual tests go here...
}
But when I try to run that test by loading the page (either in Dartium or content_shell), I get a big old stacktrace from deep within Polymer that mostly amounts to:
Uncaught Error: NotSupportedError: Registration failed for type 'polymer-element'. A type with that name is already registered.
This, and a few other related errors had me stuck. It turns out that the @initMethod annotation above the main() entry point in test.dart was the culprit. I had pulled that back from the 0.10 code and figured that it was just an annotation—and one that probably had no effect in 0.9 code—so how much harm could it cause? Well the answer is that it seems to pull in enough Polymer code to cause my stack trace.

After removing the @initMethod annotation, my tests… still fail. They fail, but don't error out. The failures are due to differences between the MDV approach that I have in this “play” Polymer example and the one that I used in the actual book code. The actual book code is cleaner, but I am not going to worry about clean code in my play area. Instead, I update the XPizzaComponent page object class to extract topping information from the attributes that I want to test anyway (I have an internal property in the “real” code):
class XPizzaComponent {
  PolymerElement el;
  XPizzaComponent(this.el);

  // Extract information from the page
  String get wholeToppings => el.attributes['toppings'];
  String get firstHalfToppings => el.attributes['toppings1'];
  String get secondHalfToppings => el.attributes['toppings2'];
  // ...
}
Then I can write my nice, clean Page Objects tests that verify that my new attributes behave as desired:
  group("[adding toppings]", (){
    test('updates the pizza state accordingly', (){

      schedule(()=> xPizza.addWholeTopping('green peppers'));

      schedule((){
        expect(xPizza.wholeToppings, contains('green peppers'));
        expect(xPizza.firstHalfToppings, isNull);
        expect(xPizza.secondHalfToppings, isNull);
      });
    });
  });
Which does the trick nicely:
PASS: [defaults] it has no toppings
PASS: [adding toppings] updates the pizza state accordingly
All 2 tests passed.
Dang it. I was so close last night. If I had only guessed the right thing to investigate, I could have performed a little test driven development on my new model-driven attributes. Ah well, there is still time for that. But first, I will investigate how @initMethod should be used in Polymer.dart 0.9. I never really expected it to have an effect on my code. Since it does, it must be used for something in 0.9. If that something is similar to the Polymer test setup that I had to do in 0.10, then I believe that I have some test re-organization that I can undertake.

Tomorrow.


Day #80

Friday, May 30, 2014

Model Driven Polymer Attributes


Up tonight, a (hopefully) simple update of a Polymer feature.

Last night I was able to use attributes to set the initial toppings for a pizza in the <x-pizza> Polymer-based custom element:


Today, I would like to do the opposite: ensure that topping changes are reflected in the same attributes that are used to set the initial toppings. That is, if an <x-pizza> starts with:
<x-pizza toppings="pepperoni,sausage"></x-pizza>
And the user adds green peppers, then the attribute should report:
<x-pizza toppings="pepperoni,sausage,green peppers"></x-pizza>
Mercifully, this is fairly easy in Polymer. It also helps that the infrastructure is already in place in the backing x_pizza.dart backing class. The whole toppings attribute (toppings) and the first and second half attributes (toppings1 and toppings2) are already published in the backing class. I also have an updatePizzaState method that gets invoked whenever the model in my model driven view is updated:
@CustomTag('x-pizza')
class XPizza extends PolymerElement {
  // ...
  @published String toppings = '';
  @published String toppings1 = '';
  @published String toppings2 = '';

  XPizza.created(): super.created() {
    model = new Pizza()
      ..changes.listen(updatePizzaState);
    // ...
  }
  // ...
}
The above changes stream just works because the model class has all the observables in place:
class Pizza extends Observable {
  ObservableList<String> firstHalfToppings = toObservable([]);
  ObservableList<String> secondHalfToppings = toObservable([]);
  ObservableList<String> wholeToppings = toObservable([]);

  Pizza() {
    firstHalfToppings.changes.listen((_)=> notifyChange(_));
    secondHalfToppings.changes.listen((_)=> notifyChange(_));
    wholeToppings.changes.listen((_)=> notifyChange(_));
  }
}
Back in the MDV class, updatePizzaState needs only a new secondary method call, to the new _updateAttributes() method which simply assigns the three attributes::
  
  // ...
  updatePizzaState([_]) {
    _updateText();
    _updateGraphic();
    _updateAttributes();
  }
  // ...
  _updateAttributes() {
    toppings = model.wholeToppings.join(',');
    toppings1 = model.firstHalfToppings.join(',');
    toppings2 = model.secondHalfToppings.join(',');
  }
  // ...
And that does the trick nicely:


I am not sure that is the simplest solution possible, so I had hoped to drive some of this with tests. Unfortunately, testing turns out to be a little harder than expected. But that's a tale for tomorrow. For today, I am happy that updating attributes had no unexpected surprises.


Day #79

Thursday, May 29, 2014

Waiting for Polymer Assets


I really should have done this before I went through all the SVG craziness, but it would be super helpful if I could specify toppings via attribute of my <x-pizza> Polymer element, which enables building pizzas via web component:


That is, I would like to specify that a two topping special starts as something akin to:
  <body>
    <div class="container">
      <h1>Ye Olde Dart Pizza Shoppe</h1>
      <x-pizza toppings="sausage,pepperoni"></x-pizza>
    </div>
  </body>
I expect that it will be fairly easy to push this information into my Polymer element, complicated only slightly by the model-driven view approach taken inside the element. Slightly more difficult is reflecting internal changes back on this attribute.

Anyhow, getting started, I try a simple split() to break the attribute into a list of attributes that can be added to the model. I do this in the created() life-cycle method of the Polymer class:
@CustomTag('x-pizza')
class XPizza extends PolymerElement {
  //...
  @published String toppings = '';
  XPizza.created(): super.created() {
    model = new Pizza();

    toppings.
      split(new RegExp(r'\s*,\s*')).
      forEach((t){ model.wholeToppings.add(t); });
  }
  //...
}
When I load the page, however, I get all manner of errors related to adding empty SVG content. It turns out that my <polymer-ajax> strategy for loading SVG assets finally bit me. By starting the drawing off with toppings, I am no longer giving my assets time to load.

Async Dart to the rescue. I add an svgLoaded completed in the created() method:
Completer svgLoaded;
  XPizza.created(): super.created() {
    // ...
    svgLoaded = new Completer();
  }
The _updateGraphic() method now needs to honor that completer. If the completer is still in progress, then updating the graphics needs to wait for the assets to fully load and, only then, actually update the graphic:
  _updateGraphic() {
    if (!svgLoaded.isCompleted) {
      svgLoaded.future.then((_) => _updateGraphic());
      return;
    }

    svg = new SvgElement.svg(svgContent['pizza.svg']);
    $['pizza']
      ..children.clear()
      ..append(svg);

    _addWholeToppings();
    _addFirstHalfToppings();
    _addSecondHalfToppings();
  }
Once svgLoaded has completed for the first time, the svgLoaded.isComplete check will always return true. In other words, _updateGraphic() will wait at first but once the assets have loaded, the check for svgLoaded.isComplete will be ignored for the remainder of the element's lifetime.

Deciding when the assets are fully loaded will be the responsibility of the recently created responseReceived() method:
  responseReceived(e, detail, node){
    svgContent[node.id] = detail['response'];
    if (node.id == 'pizza.svg') _updateGraphic();
  }
This method accepts what the <polymer-ajax> method supplies when invoked from an on-polymer-response callback. Each of the assets in the <x-pizza> template call this method:
<polymer-element name="x-pizza">
  <template>
    <polymer-ajax
       id="pizza.svg"
       url="/packages/svg_example/images/pizza.svg"
       on-polymer-response="{{responseReceived}}"></polymer-ajax>
    <polymer-ajax
       id="pepperoni.svg"
       url="/packages/svg_example/images/pepperoni.svg"
       on-polymer-response="{{responseReceived}}"></polymer-ajax>
    <polymer-ajax
       id="sausage.svg"
       url="/packages/svg_example/images/sausage.svg"
       on-polymer-response="{{responseReceived}}"></polymer-ajax>
    <polymer-ajax
       id="green_pepper.svg"
       url="/packages/svg_example/images/green_pepper.svg"
       on-polymer-response="{{responseReceived}}"></polymer-ajax>
     <!-- ... -->
  </template>
  <script type="application/dart" src="x_pizza.dart"></script>
</polymer-element>
So, by the time all assets have loaded, responseReceived() will have been invoked 4 times. I could hard-code this, but that would not be future-proof. Instead, I query my element's shadow DOM for the number of <polymer-ajax> elements:
  responseReceived(e, detail, node){
    svgContent[node.id] = detail['response'];
    if (svgContent.length == shadowRoot.queryAll('polymer-ajax').length) {
      svgLoaded.complete();
    }

    if (node.id == 'pizza.svg') _updateGraphic();
  }
With that, I have <x-pizza> accepting start values:


That seems a good stopping point for tonight. Tomorrow, I will pick back up with reflecting changes back from the model onto topping attributes. There may be little more than watching attribute changes, but if tonight is any indication, it is a good bet that some previous silly assumption on my part will come back to bite me. Stayed tuned!


Day #78

Wednesday, May 28, 2014

SVG Viewports: Who Knew?


Today could be a very important day for me. It could be the last time that I ever blog about SVG and clipping. It's either that or today is the day that I start a new chain supporting a book entitled “SVG Clipping and You.” I'm really hoping for the former.

Two days ago I blogged what I hoped at the time would be my last ever SVG clipping post. In it, I essentially gave up trying to get clipping working and instead implemented a workaround in which I used the view port that SVG gave me instead of hoping for more. And then Emanuele Sabetta added a comment to that post potentially identifying what I was doing wrong.

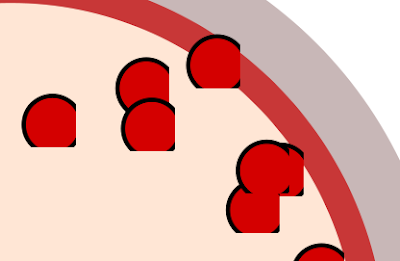
The problem remains that I cannot translate the SVG toppings in my <x-pizza> pizza building Polymer element. Well, I can translate them, but they are mysteriously clipped if I stray too far:


I tried overflow and clip properties on those SVG elements, but to no avail. The SVG images were always clipped when moved too far. The “pepperoni” images are sized initially to 32×32 in the asset:
<?xml version="1.0" encoding="UTF-8" standalone="no"?>
<!-- Created with Inkscape (http://www.inkscape.org/) -->
<svg
   xmlns:svg="http://www.w3.org/2000/svg"
   xmlns="http://www.w3.org/2000/svg"
   version="1.1"
   width="32"
   height="32">
  <path
      d="M 22,12 A 10,10 0 1 1 2,12 10,10 0 1 1 22,12 z"
      style="fill:#d40000;fill-opacity:1;stroke:#000000;stroke-width:1.5;stroke-miterlimit:4;stroke-opacity:1;stroke-dasharray:none" />
</svg>
From what I glean from Emanuele's comments, I may not even be getting 32×32 for the viewport. Rather, I may only be getting 22×22 from the drawing area (plus a little from the stroke and filter). Anyhow, to test the viewport, I start the SVG 16 pixels to the right, which should be outside the default viewport regardless if it is 32×32 or slightly smaller:
    var path = svg.query('path')
      ..setAttribute('transform', 'translate(16,0)');
And indeed, it is clipped by the viewport:


Now, I apply a viewport. I am going to define the viewport such that it is definitely larger than 32×32 initial size so that it ought to fit my translated image. 48×48 ought to do:
    svg.query('svg')
      ..setAttribute('viewBox', '0 0 48 48');
And indeed it does the trick. The pepperoni images are no longer clipped:


It is no longer clipped, but the images are now scaled smaller. The reason that they are smaller is that I am squishing a 48×48 viewport into a 32×32 sized image. If I change the width and height attributes on the SVG image to match the viewport:
    svg.query('svg')
      ..setAttribute('viewBox', '0 0 48 48')
      ..setAttribute('width', '48')
      ..setAttribute('height', '48');
Then I have my pepperonis translated 16 pixels, still in the viewport, and not scaled:


So the mystery of the clipping seems to be solved (thanks yet again to Emanuele!).

Before calling it a night, I note that this viewport stuff is really non-obvious in browsers. Even with the viewport set to 48×48 and the SVG image set to 48×48, the browser reports the size of the drawing to be just the drawing:


The group element that holds the translated SVG asset does have appropriately large dimensions:


But the dimensions are exactly as they were prior to fiddling with the viewport:


In other words, there is no indication whatsoever that the viewport is at play here, which is what led me down the ill-fated clip and overflow path.

Thankfully, I can rely on the kindness of others to educate me when I go wrong. Thanks again, Emanuele.

Up tomorrow: I get back to a little pure Polymer code as I prep for the actual Patterns in Polymer screencasts.


Day #77

Tuesday, May 27, 2014

Mouse Events and SVG Paths


I keep promising myself that I am going to stop this, but… there's a minor SVG problem that I'd like to solve tonight.

As an aside, I am likely to keep pushing through some of these smaller problems as I work through the remaining Dart for Hipsters errata. I cannot risk offending the writing gods by breaking this chain o’ learning, but I also need my primary focus to be on that book. Anyhow…

The problem tonight is that mouse over and leave events are causing some weird behavior with the SVG toppings in my <x-pizza> pizza-building Polymer element:


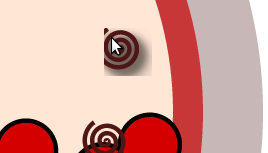
The problem occurs with mouse-overs. When I first approach the pepperoni topping:


I have not yet triggered the mouse-over event at this point. When I do, the pepperoni pops up:


The problem is that the pointer is no longer over the path that draws the SVG pepperoni so that even the slightest movement at this point will trigger a mouseleave. This mouseleave triggers an event the moves the pepperoni back in its original location, which causes the pepperoni to shift back under the pointer.


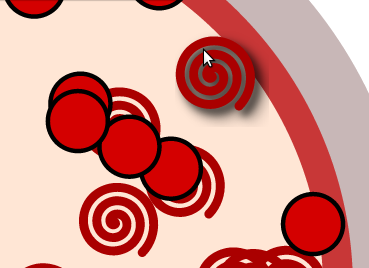
In other words, the pepperoni jumps back and forth until the pointer is in a location that is over the raised and rest pepperoni. It is a very annoying effect, especially with SVG elements that are not as solid as the pepperoni:


So this is a problem that I would very much like to eliminate. Of course, this is SVG, so it leads me into yet another unexpected tour of things that don't quite work like you expect them to work. For example, my initial suspicion for this problem fell on the combination of path, SVG container, and group element that hold the various toppings. It seemed plausible that the path was generating the jittering mouse events, but that I could ignore them and only pay attention to mouse events on the group or SVG element. But simple debugging in the mouse handlers:
  _svgImage(basename) {
    var svg = new GElement()
      ..append(new SvgElement.svg(svgContent['$basename.svg']));
    // ...
    return svg
      ..onMouseOver.listen((e){
          print('[mouseover] ${e.target}');
          // transforms here...
        })
        // ...
  }
Tells me that only [mouseover] path events are being generated. There are no events coming from the SVG topping asset or the group element that contains both. Only the path—the circle or spiral shape—generates events, which just ain't gonna work.

The solution to this turns out to be a bit of obscure SVG chicanery and some CSS chicanery. The obscure SVG solution is to disable events from the path by setting the pointer-events attribute to none. The CSS part of the solution is to create an SVG circle that does generate events, but to make it completely transparent:
  _svgImage(basename) {
    var svg = new GElement()
      ..append(
          new CircleElement()
            ..setAttribute('r', '15')
            ..setAttribute('cx', '15')
            ..setAttribute('cy', '15')
            ..setAttribute('style', 'opacity:0')
        )
      ..append(new SvgElement.svg(svgContent['$basename.svg']));

    svg.query('svg')
      ..setAttribute('overflow', 'visible')
      ..setAttribute('clip', 'rect(-50px, 50px, 50px, -50px)')
      ..setAttribute('pointer-events', 'none');

    // Listen for events as usual, but now from the 100% transparent
    // circle
    return svg
      ..onMouseOver.listen((e){ /* ... */ })
      ..onMouseOut.listen((e){ /* ... */ });
  }
That does the trick nicely. The 100% transparent circle SVG generates the same mouse-over and mouse-leave events that had been created by the path. The Dart streams still see those events and react exactly as before—only now there is no jumping since the thing that generates events does not move because of those events. And, since pointer-events is set to none, there are no events whatsoever from the SVG asset or the path that it contains.

That seems a fine stopping point for tonight. May the writing gods look upon me with favor—especially since I may revisit SVG clipping area tomorrow.


Day #76

Monday, May 26, 2014

Clipping in SVG


I cannot help but think I still have several, fundamental gaps in my SVG knowledge. This is OK. Well… mostly OK.

My primary focus nowadays is Polymer, not SVG. As I ready to produce the screencasts for the “Extras” edition of Patterns in Polymer I am trying to gain some understanding of SVG so that I can produce an <x-pizza> custom element that enables hungry folks to build their own pizzas:


I am almost certainly over-thinking the SVG component of this, but I hate to recommend an approach that proves difficult or impossible to maintain. All the more so if the recommendation is going into video. I am going to have a hard enough time producing videos that will withstand 6 months of Polymer development without worrying about messing up something as old as SVG.

So tonight, I take one more try at getting the individual toppings to popup and generate a drop shadow without getting clipped:


Those toppings are loaded from SVG assets and inserted directly into the base pizza SVG, <svg> tag and all. This seems to work just fine save for the clipping when I translate the topping SVG inside the base SVG. My first fix try is to set overflow=visible. I start with the generic Dart method that takes the previously loaded asset to create a new topping:
  _svgImage(basename) {
    var svg = new GElement()
      ..append(new SvgElement.svg(svgContent['$basename.svg']));

    svg.setAttribute('overflow', 'visible');
    svg.query('svg').setAttribute('overflow', 'visible');

    var path = svg.query('path');
    path.setAttribute('overflow', 'visible');
    var style = path.getAttribute('style');

    return svg
      ..onMouseOver.listen((e){ /* ... */ })
      ..onMouseLeave.listen((e){ /* ... */ });
  }
And, although that attribute is seen in the resulting DOM, it has no effect on the clipping of my topping elements:


And, unfortunately, I find similar results when I try to set the clipping area:
    // ...
    svg
      ..setAttribute('overflow', 'visible')
      ..setAttribute('clip', 'rect(-50px, 50px, 50px, -50px)');

    svg.query('svg')
      ..setAttribute('overflow', 'visible')
      ..setAttribute('clip', 'rect(-50px, 50px, 50px, -50px)');

    var path = svg.query('path')
      ..setAttribute('overflow', 'visible')
      ..setAttribute('clip', 'rect(-50px, 50px, 50px, -50px)');
    // ...
For what it is worth, setting the clip property on the SVG asset does have an effect. If I make it small (20 pixels on a 32 square pixel image):

    // ...
    svg.query('svg')
      ..setAttribute('overflow', 'visible')
      ..setAttribute('clip', 'rect(-50px, 20px, 20px, -50px)');
    // ...
Then the clipping area is noticeably decreased:


But there does not seem to be a way to set the clipping area to negative values so that it expands outside the original image. Bother.

In the end, I give up. Well, I get it working, but in a completely unsatisfactory manner. I create the SVG images with the drawings shifted slightly to the top-left corner. Then, in the _svgImage() method, I make the rest position of the toppings shifted down and to the right (i.e. more toward the center of the image):
  _svgImage(basename) {
    var svg = new GElement()
      ..append(new SvgElement.svg(svgContent['$basename.svg']));

    svg.query('svg')
      ..setAttribute('overflow', 'visible')
      ..setAttribute('clip', 'rect(-50px, 50px, 50px, -50px)');

    var path = svg.query('path')
      ..setAttribute('transform', 'translate(2.8577037,1.6074583)');
    var style = path.getAttribute('style');

    return svg
      ..onMouseOver.listen((e){
          path
            ..setAttribute('style', '$style;filter:url(#topping-drop-shadow)')
            ..setAttribute('transform', 'translate(0,0)');
        })
      ..onMouseLeave.listen((e){
          path
            ..setAttribute('style', style)
            ..setAttribute('transform', 'translate(2.8577037,1.6074583)');
      });
  }
The mouse-enter and mouse-leave stream listeners now have to adjust accordingly.

Which does the trick:


Not wanting to turn this into an SVG chain, I will probably call a halt to clipping investigation there. The solution is not at all satisfactory, but it works. And if any viewers know how to do it right, they ought to be able to mentally correct this approach without much effort.


Day #75

Sunday, May 25, 2014

One SVG Filter to Rule Them All


I have my SVG-based Polymer custom element in happy shape at this point. The <x-pizza> element is in nice code shape and, more importantly, building pizzas for hungry customers:


It is composed of several different SVG files, each loaded with <polymer-ajax> for simplicity and ease of dynamic manipulation. It took some tinkering, but I finally have the drop shadow for the individual toppings animating on mouse over:


The drop shadow pain was due to vagaries of SVG, but it proved that the <polymer-ajax> solution to loading other SVG assets (pizza toppings in this case) into a primary SVG worked and could still be effectively manipulated. I would like to build on that idea tonight by adding drop shadows to each of my toppings—not just the current pepperonis.

I could work through each topping in turn with Inkscape, defining a second layer in each that holds the topping a little higher and with a drop shadow, but that seems like tedious work. Hopefully a little Dart can solve the problem without any Inkscape time.

I start by pulling the drop shadow filter definition out of the only topping SVG that currently has it, pepperoni.svg, and placing it in the background SVG of the blank pizza:
<?xml version="1.0" encoding="UTF-8" standalone="no"?>
<!-- Created with Inkscape (http://www.inkscape.org/) -->
<svg
   xmlns:svg="http://www.w3.org/2000/svg"
   xmlns="http://www.w3.org/2000/svg"
   version="1.1"
   width="300"
   height="300">
  <defs>
    <filter
       color-interpolation-filters="sRGB"
       height="2.0"
       width="1.5"
       y="-0.2"
       id="topping-drop-shadow">
      <!-- lots and lots of filters... --> 
    </filter>
  </defs>
  <path
     d="m 300,150 a 150,150 0 1 1 -300,0 150,150 0 1 1 300,0 z"
     id="path3755"
     style="fill:#c8b7b7;fill-opacity:1;stroke:none" />
  <path
     d="m 280,150 a 130,130 0 1 1 -260,0 130,130 0 1 1 260,0 z"
     id="path3759"
     style="fill:#c83737;fill-opacity:1;stroke:none" />
  <path
     d="m 270,150 a 120,120 0 1 1 -240,0 120,120 0 1 1 240,0 z"
     id="path3761"
     style="fill:#ffe6d5;fill-opacity:1;stroke:none" />
</svg>
The only change that I make to the filter is the ID, which I now call topping-drop-shadow for code maintainability and readability. Since I append toppings to this base SVG image, the hope is that the drop shadow filter will continue to work with the topping SVG assets. Starting with pepperoni.svg, I give it a try:
<?xml version="1.0" encoding="UTF-8" standalone="no"?>
<!-- Created with Inkscape (http://www.inkscape.org/) -->
<svg
   xmlns:svg="http://www.w3.org/2000/svg"
   xmlns="http://www.w3.org/2000/svg"
   version="1.1"
   width="32"
   height="32">
  <g id="down" style="display: inline">
    <path
       d="M 22,12 A 10,10 0 1 1 2,12 10,10 0 1 1 22,12 z"
       transform="translate(2.8577037,1.6074583)"
       style="fill:#d40000;fill-opacity:1;stroke:#000000;stroke-width:1.5;stroke-miterlimit:4;stroke-opacity:1;stroke-dasharray:none" />
  </g>
  <g id="up" style="display: none">
    <path
       d="M 22,12 A 10,10 0 1 1 2,12 10,10 0 1 1 22,12 z"
       style="fill:#d40000;fill-opacity:1;stroke:#000000;stroke-width:1.5;stroke-miterlimit:4;stroke-opacity:1;stroke-dasharray:none;filter:url(#topping-drop-shadow)" />
  </g>
</svg>
Happily that does still work.

Since it works on one, the hopefully the filter can work on all of my elements. While I am at it, I would like to switch from hiding/showing layers in my SVG to translating a single layer in each topping SVG. So, I remove the group layers in pepperoni.svg which now becomes:
<?xml version="1.0" encoding="UTF-8" standalone="no"?>
<!-- Created with Inkscape (http://www.inkscape.org/) -->
<svg
   xmlns:svg="http://www.w3.org/2000/svg"
   xmlns="http://www.w3.org/2000/svg"
   version="1.1"
   width="32"
   height="32">
  <path
      d="M 22,12 A 10,10 0 1 1 2,12 10,10 0 1 1 22,12 z"
      style="fill:#d40000;fill-opacity:1;stroke:#000000;stroke-width:1.5;stroke-miterlimit:4;stroke-opacity:1;stroke-dasharray:none" />
</svg>
That is much, much smaller without the filter definition and the layers.

Now I can eliminate the layer code that had supported the pepperoni SVG:
  _svgPepperoni() {
    var svg = _svgImage('pepperoni');
    return svg
     ..onMouseOver.listen((e){
          svg.query('#up').style.display = '';
          svg.query('#down').style.display = 'none';
        })
      ..onMouseLeave.listen((e){
          svg.query('#up').style.display = 'none';
          svg.query('#down').style.display = '';
      });
  }
Instead, the pepperoni now uses the same function as all of the other toppings:
  _svgPepperoni()   => _svgImage('pepperoni');
  _svgSausage()     => _svgImage('sausage');
  _svgGreenPepper() => _svgImage('green_pepper');
Finally, the _svgImage() function now does translation and filter application when mouse events occur:
  _svgImage(basename) {
    var svg = new GElement()
      ..append(new SvgElement.svg(svgContent['$basename.svg']));

    var path = svg.query('path');
    var style = path.getAttribute('style');

    return svg
      ..onMouseOver.listen((e){
          path
            ..setAttribute('style', '$style;filter:url(#topping-drop-shadow)')
            ..setAttribute('transform', 'translate(-2.8577037,-1.6074583)');
        })
      ..onMouseLeave.listen((e){
          path
            ..setAttribute('style', style)
            ..setAttribute('transform', 'translate(0,0)');
      });
  }
And that does the trick. I now get drop shadows for all of my toppings:


Well, that might not be 100% working. I still need to figure out how best to handle the drawing area clipping, but this is getting very close to good enough. I will pick back up with the clipping tomorrow.


Day #74

Saturday, May 24, 2014

Inkscape vs. Browser SVG Filter Postioning


I ended last night's Polymer / SVG effort with a problem. Not so much a Polymer problem as an SVG problem. I have some fairly simple DOM animation triggered by mouse-overs:


All of this works, except the stinking drop shadow filter, which is getting clipped. This seemed a simple problem at first—I assumed that I only needed to resize the SVG “pepperoni” in my <x-pizza> pizza building custom element. But no matter how I resized the SVG—attributes, style, mucking with the SVG itself, or even trying it different browsers—I could not get the shadow to be unclipped. I am honestly tempted to just drop it (yeah, I said it) and move on to other, more Polymer-y things. But darn it, why won't it unclip? (declip?)

Happily, Emanuele Sabetta had a suggestion in last night's comments. Instead of fiddling with the elements attributes, perhaps I need to change the filter attributes.

So I fire up Inkscape again, open my pepperoni SVG file, and start the Filter Editor (Filters → Filter Editor…):


First off, wow. That is a lot of filtering for a simple drop shadow. Looking through it, I can understand why some of it is needed, but two blurs? Anyhow, after recovering from filter astonishment, I see that the filter area (the dashed box) does seem to clip some of the drop shadow. Hopefully this is the problem. I change the width and height to 1.5—it would seem that is 1.5× the path being shadowed, not the entire image. I then adjust the center of the filter accordingly so that it still encompasses the area that I would like to see the effect:


Checking the resulting XML in Inkscape's XML Editor, I see that this results in three new attributes to the filter:


Well, heck. I can type those in myself in the SVG being used in <x-pizza>:
<?xml version="1.0" encoding="UTF-8" standalone="no"?>
<!-- Created with Inkscape (http://www.inkscape.org/) -->
<svg
   xmlns:svg="http://www.w3.org/2000/svg"
   xmlns="http://www.w3.org/2000/svg"
   version="1.1"
   width="32"
   height="32">
  <defs>
    <filter
       color-interpolation-filters="sRGB"
       height="1.5"
       width="1.5"
       y="-0.4"
       id="filter3790">
      <feFlood
      <!-- ... -->
  </defs>
  <!-- ... -->
</svg>
And, when I reload that in the browser, I find:


Arrrgh! Are you kidding me?! It's still clipped!

Ah, but it is not clipped as much, and not at all in the x-direction. So I change the height to 2.5, reload and...


<Sniff>. It's so beautiful!

I am unsure why there is a discrepancy between Inkscape's bounding area in the Filter Editor and the area that is actually clipped in the image. I trial-and-error the actual lower limit of the height and y-position of the filter to find:
    <filter
       color-interpolation-filters="sRGB"
       height="2.0"
       width="1.5"
       y="-0.2"
       id="filter3790">
So fiddling with the values in Inkscape's Filter Editor put me on the right track, but only manual intervention got me the full solution:


No matter how I got the solution, I will take it.


Day #73


Friday, May 23, 2014

DOM Animation of SVG


Up today, I try to build on the SVG loading solution for my <x-pizza> custom Dart Polymer element:


Thanks to last night, I am loading SVG content directly into my application via the Polymer Elements' <polymer-ajax>:
<link rel="import" 
      href="../../../packages/polymer_elements/polymer_ajax/polymer_ajax.html">
<polymer-element name="x-pizza">
  <template>
    <polymer-ajax
       id="pizza.svg"
       url="/packages/svg_example/images/pizza.svg"
       on-polymer-response="{{responseReceived}}"></polymer-ajax>
    <polymer-ajax
       id="pepperoni.svg"
       url="/packages/svg_example/images/pepperoni.svg"
       on-polymer-response="{{responseReceived}}"></polymer-ajax>
    <!-- ... -->
  </template>
  <script type="application/dart" src="x_pizza.dart"></script>
</polymer-element>
When each is loaded, I populate a content map:
  Map svgContent = {};
  responseReceived(e, detail, node){
    svgContent[node.id] = detail['response'];
  }
And then use that content to build up groups of toppings from that SVG text:
  _svgPepperoni()   => _svgImage('pepperoni');
  _svgSausage()     => _svgImage('sausage');
  _svgGreenPepper() => _svgImage('green_pepper');

  _svgImage(basename) => new GElement()
    ..append(
      new SvgElement.svg(svgContent['$basename.svg'])
    );
To animate, I convert the _svgPepperoni() method to make use of the two layers that I added to the SVG toppings the other day:

  _svgPepperoni() {
    var svg = _svgImage('pepperoni');
    return svg
      ..onMouseOver.listen((e){
        svg.query('#up').style.display = '';
        svg.query('#down').style.display = 'none';
      })
      ..onMouseLeave.listen((e){
        svg.query('#up').style.display = 'none';
        svg.query('#down').style.display = '';
      });
  }
Which does the trick nicely:


Except for one little problem. The SVG image is clipped to 25 pixels, which cuts off the nice drop shadow effect of the topping:


Unfortunately, I can find no explanation for why this is the case. My best guess is that the path only accounts for roughly 25 square pixels, which is where the browser gets this value from. Setting width attributes and style values has no effect. It is also possible that this is a function of adding SVG elements to another SVG:


The “inner” SVG in this case is the pepperoni SVG, which I use to populate a <g> element for the topping. I do try adding the path directly to the topping <g> tag, but even that does not make a difference.

Stumped, I call it a night here. Thankfully, the DOM mouse-over code was quite easy. Hopefully I am just making a dumb SVG mistake with the topping size. I will investigate further tomorrow.

Day #72

Thursday, May 22, 2014

Polymer Elements Loading SVG in Polymer, uh… Custom Elements?


It occurs to me that, if I have a bunch of static files to load in a custom Polymer element, then perhaps some of the extended Polymer family may be of some use.

I am continuing my efforts to understand how best to build and package a Polymer custom element that includes SVG components. Specifically, the <x-pizza> pizza building element:


My initial attempts at loading SVG files with mundane things like <image> tags went well until I needed to animate those files. I already have a handle on loading a single SVG file with HttpRequest. I think I can probably do the same for the remaining assets, but it occurs to me that I need to do this in JavaScript and Dart, which complicates things.

The driving force behind this is producing screencasts for the “Extras” version of Patterns in Polymer. I plan on producing short screencasts in both JavaScript and Dart (since the book comes in both flavors). Herein lies the complication. XHR coding in JavaScript is pretty awful without a separate library. And if I'm pulling in libraries, why not just stick with Polymer? Or, in this case the <polymer-ajax> custom element that comes in Polymer Elements.

To explore this idea, I stick with Dart for now and start by updating my application's pubspec.yaml to depend on Polymer Elements:
name: svg_example
dependencies:
  polymer: any
  polymer_elements: any
dev_dependencies:
  unittest: any
transformers:
- polymer:
    entry_points: web/index.html
A quick pub update and I am ready to rock.

And rock I do. Starting with the <x-pizza.html> template, in which I import the Polymer Elements' <polymer-ajax> tag and put it to use loading the various SVG files:
<link rel="import" 
      href="../../../packages/polymer_elements/polymer_ajax/polymer_ajax.html">
<polymer-element name="x-pizza">
  <template>
    <polymer-ajax
       id="pizza.svg"
       url="/packages/svg_example/images/pizza.svg"
       on-polymer-response="{{responseReceived}}"></polymer-ajax>
    <polymer-ajax
       id="pepperoni.svg"
       url="/packages/svg_example/images/pepperoni.svg"
       on-polymer-response="{{responseReceived}}"></polymer-ajax>
    <!-- ... -->
  </template>
  <script type="application/dart" src="x_pizza.dart"></script>
</polymer-element>
Inside my own custom element, I follow the convention of using the SVG filename for the tag ID. This should make it easy to decipher which element has loaded when the responseReceived() method is invoked as each of those SVG files is loaded in turn. Speaking of responseReceived(), I define that as:
@CustomTag('x-pizza')
class XPizza extends PolymerElement {
  // ...
  Map svgContent = {};
  responseReceived(e, detail, node){
    svgContent[node.id] = detail['response'];
    if (node.id == 'pizza.svg') _updateGraphic();
  }
  // ...
}
With each of the SVG file contents now available in the svgContent map, I can use them in places like _updateGraphic():
  _updateGraphic() {
    svg = new SvgElement.svg(svgContent['pizza.svg']);
    $['pizza']
      ..children.clear()
      ..append(svg);

    _addWholeToppings();
    _addFirstHalfToppings();
    _addSecondHalfToppings();
  }
That works quite nicely. It would be nice if the Dart version of <polymer-ajax> exposed a Future instead of relying on the responseReceived() bound methods. Even so, this is a relatively clean solution for SVG file loading in my custom Polymer element. Up tomorrow: I see if I can exploit this approach to animate some of the individual SVG files.


Day #71

Wednesday, May 21, 2014

Not-So-Simple Mouse Animations in SVG


I am curious about SVG animation in Polymer. I already have a little animation working in my <x-pizza> custom pizza builder element:


When new toppings are added, they glide in from the left and float down onto the pizza. I do not want to categorize the implementation of this animation as ugly, so let's just call it… involved. I have two separate window.requestAnimationFrame() timers running to translate the X and Y coordinates of the group containing the toppings. The solution may be involved, but it works brilliantly—low overhead and quite smooth.

Still, I would like to improve my SVG animation skills so tonight I try something a little simpler: animating toppings on mouse-over. In particular, I would like the topping to pop-up with a drop shadow when the discerning pizza buyer hovers over the individual topping.

I have come across JavaScript callbacks inside Inkscape:


But I'll be darned if I can figure out what to put in those fields. Besides, I am currently coding in Dart, so that seems less than ideal.

Instead, I define two different layers for this particular SVG. The “rest” state layer, which I name “down”:


And the on-hover layer, which I name “up”:


When I save this as plain (not Inkscape formatted) SVG, I leave the “eye” icon on the Up layer closed so that the image will default to the down/rest state. Checking the saved SVG, this is indeed styled with style="display:none" on the Up layer:
<?xml version="1.0" encoding="UTF-8" standalone="no"?>
<!-- Created with Inkscape (http://www.inkscape.org/) -->
<svg
   xmlns:svg="http://www.w3.org/2000/svg"
   xmlns="http://www.w3.org/2000/svg"
   version="1.1"
   width="32"
   height="32">
  <defs>
    <filter
       color-interpolation-filters="sRGB"
       id="filter3790">
      <!-- drop shadow filter definition here... -->
    </filter>
  </defs>
  <g
     id="down"
     style="display:inline">
    <path
       d="M 22,12 A 10,10 0 1 1 2,12 10,10 0 1 1 22,12 z"
       transform="translate(2.8577037,1.6074583)"
       style="fill:#d40000;fill-opacity:1;stroke:#000000;stroke-width:1.5;stroke-miterlimit:4;stroke-opacity:1;stroke-dasharray:none" />
  </g>
  <g
     id="up"
     style="display:none">
    <path
       d="M 22,12 A 10,10 0 1 1 2,12 10,10 0 1 1 22,12 z"
       style="fill:#d40000;fill-opacity:1;stroke:#000000;stroke-width:1.5;stroke-miterlimit:4;stroke-opacity:1;stroke-dasharray:none;filter:url(#filter3790)" />
  </g>
</svg>
I had to manually edit those id attributes.

To animate, I then add some mouse stream event listeners:
  _svgImage(basename) => new GElement()..append(
    new ImageElement()
      ..setAttributeNS(
          'http://www.w3.org/1999/xlink',
          'href',
          '/packages/svg_example/images/$basename.svg'
        )
      ..setAttribute('width', '32')
      ..setAttribute('height', '32')
      ..onMouseOver.listen((e){
          this.query('#up').style.display = '';
          this.query('#down').style.display = 'none';
        })
      ..onMouseLeave.listen((e){
          this.query('#up').style.display = 'none';
          this.query('#down').style.display = '';
        })
   );
The problem with that approach is that the up and down layers are in the image that is loaded into the ImageElement object:
    new ImageElement()
      ..setAttributeNS(
          'http://www.w3.org/1999/xlink',
          'href',
          '/packages/svg_example/images/$basename.svg'
        )
        // ...
As such, when I query for the up and down layers, they are not in the ImageElement that I am dynamically creating. They are in the SVG image file that is loaded by virtue of that href attribute. And I cannot figure out how to dynamically gain access to it.

On a lark, I try adding onmouseover attributes to the static SVG file. I also try defining <style> tags within the static SVG. Neither seems to have an effect when loaded from an ImageElement—both work when the static SVG is loaded directly, but not in my application code. So I would seem to be at an impasse.

There must be some way to get at the underlying SVG when loaded as an <image>. I will continue digging for it tomorrow.


Day #70

Tuesday, May 20, 2014

Limited SVG Manipulation in Dart


Tonight I hope to make use of Dart's built-in dart:svg library to clean up the code in my Polymer custom element.

The custom element in question, <x-pizza>, facilitates pizza buying by drawing (with SVG) the current state of to-be-purchased pizza:


Nearly every aspect of SVG has been a struggle for me, so I did not concern myself much with prettiness of code, although one cannot help oneself sometimes with Dart. Still, there are aspects that can be made better if I dig a little deeper into dart:svg

I notice that the graphical elements in dart:svg all have width, height, and href properties. So it sure would be nice to rewrite _svgImage() with that in mind. That is, this:
  _svgPepperoni()   => _svgImage('pepperoni');
  _svgSausage()     => _svgImage('sausage');
  _svgGreenPepper() => _svgImage('green_pepper');

  _svgImage(basename) {
    var svgImage = new ImageElement()
      ..setAttributeNS(
          'http://www.w3.org/1999/xlink',
          'href',
          '/packages/svg_example/images/$basename.svg'
        )
      ..setAttribute('width', '16')
      ..setAttribute('height', '16');

    return new GElement()
      ..append(svgImage);
  }
Would look better with svgImage being assigned as:
    var svgImage = new ImageElement()
      ..href = '/packages/svg_example/images/$basename.svg'
      ..width = '16'
      ..height = '16';
Sadly, that does not work. Upon closer examination, each of those properties is final in Dart. Huge bummer.

At least Dart makes it possible to set those properties with setAttribute() and setAttributeNS(), but it sure would be cleaner to be able to do so with proper setters. This does not bode well for dart:svg making SVG life easier. In fact most properties turn out to be final (e.g. translate, which sure should have helped).

If manipulating SVG is not going to be pretty in Dart, then perhaps loading it can be? I am currently starting a clean pizza via a combination of static <svg> tags in the Polymer template:
      <svg version="1.1"
        baseProfile="full"
        id="pizza-graphic"
        style="display: block; margin: 10px auto"
        width="300" height="300"
        xmlns="http://www.w3.org/2000/svg">
      </svg>
And a fresh slate that is drawn dynamically each time a topping is added to the pizza:
  _updateGraphic() {
    $['pizza-graphic'].innerHtml = '''
      <circle cx="150" cy="150" r="150" fill="tan" />
      <circle cx="150" cy="150" r="140" fill="darkred" />
      <circle cx="150" cy="150" r="135" fill="lightyellow" />
    ''';

    _addWholeToppings();
    _addFirstHalfToppings();
    _addSecondHalfToppings();
  }
If I save an SVG blank pizza image from Inkscape, I can load it with an HttpRequest:
  _updateGraphic() {
    HttpRequest.
      getString('/packages/svg_example/images/pizza.svg').
      then((svgContent){
        $['pizza'].innerHtml = '';
        svg = new SvgElement.svg(svgContent);
        $['pizza'].append(svg);
      });

    _addWholeToppings();
    _addFirstHalfToppings();
    _addSecondHalfToppings();
  }
That works just fine, but I am unsure that it improves things significantly in this case. Regardless, that seems like a useful trick to keep in my SVG toolbox (thanks to Emanuele Sabetta for the approach). If nothing else, it cuts down on static SVG coding, moving the definition into static files where it belongs. In more complex base SVG images, this approach would likely be a much more significant win.


Day #69


Monday, May 19, 2014

Packaging Inkscape SVG for Polymer Custom Elements


Tonight I would like to switch over all of the SVG pizza toppings in the <x-pizza> Polymer custom element to individual SVG files. Using last night's approach to creating topping icons, I create a green pepper SVG in Inkscape:


As well as a sausage SVG:


I actually forget to delete the default layer in the first one, but a quick inspection of the SVG contents reveals the dead-giveaway of the <g> tag and I redo the image.

Inside the Polymer.dart code, I am still generating an SVG <image> to be added to the main SVG definition of the pizza crust and cheese. Since the only difference between the two new toppings and the previous implementation of the pepperoni topping will be the filename of the SVG icon, I have the opportunity for some code reuse:
  _svgPepperoni()   => _svgImage('pepperoni');
  _svgSausage()     => _svgImage('sausage');
  _svgGreenPepper() => _svgImage('green_pepper');

  _svgImage(basename) {
    var svgImage = new ImageElement()
      ..setAttributeNS(
          'http://www.w3.org/1999/xlink',
          'href',
          '/assets/svg_example/$basename.svg'
        )
      ..setAttribute('width', '16')
      ..setAttribute('height', '16');

    return new GElement()
      ..append(svgImage);
  }
Just like that, I see my new SVG images on the <x-pizza> custom pizza builder:


The green peppers should probably be slightly thicker, but that aside, it is pretty cool to be able to add my SVG images that quickly.

Before calling it a night, I need to address a warning that I get from Dart Pub's smoke-testing web server:
➜  dart git:(master) ✗ pub serve
Warning: Pub reserves paths containing "assets" for using assets from packages.
Please rename the directory "build/assets".
Loading source assets... 
Loading observe transformers... (3.8s)
Loading polymer transformers... (2.0s)
Serving svg_example web  on http://localhost:8080
Serving svg_example test on http://localhost:8081
Build completed successfully
It seems that the assets directory in Pub packages is going away. I heartily approve of this move as it was overly complex. But, for these SVG image assets to work when the <x-pizza> element is installed and used in other applications, I need to move these files. Instead of residing in assets, I need to move them into the lib directory. I opt to place CSS for my custom element into lib/styles and my SVG images into lib/images:
➜  dart git:(master) ✗ mkdir lib/styles
➜  dart git:(master) ✗ mkdir lib/images
➜  dart git:(master) ✗ mv asset/*.svg lib/images
➜  dart git:(master) ✗ mv asset/*.css lib/styles
➜  dart git:(master) ✗ rmdir asset 
The new location means that the images are now accessed from the /packages/<package_name>/images path, so I update the _svgImage() method accordingly for this svg_example package:
  _svgImage(basename) {
    var svgImage = new ImageElement()
      ..setAttributeNS(
          'http://www.w3.org/1999/xlink',
          'href',
          '/packages/svg_example/images/$basename.svg'
        )
      ..setAttribute('width', '16')
      ..setAttribute('height', '16');

    return new GElement()
      ..append(svgImage);
  }
With that, I no longer have any warnings when I start the Pub web server:
➜  dart git:(master) ✗ pub serve        
Loading source assets... 
Loading observe transformers... (3.9s)
Loading polymer transformers... (1.9s)
Serving svg_example web  on http://localhost:8080
Serving svg_example test on http://localhost:8081
Build completed successfully
And everything continues to work as before.

I do believe that I am getting the hang of this SVG stuff in Inkscape. Up tomorrow, I plan to explore Dart's SVG facilities a little more.


Day #68

Sunday, May 18, 2014

Drawing Simple SVG (and XML) in Inkscape


Tonight I continue my efforts to figure out Inkscape and how best to use it to generate SVG for use in Polymer custom elements.

Last night, I was able to save an SVG file from Inkscape and load it as an <image> (not an <img> element) inside another SVG animation. Even so, I am still not quite satisfied with how I use Inkscape. I ignored it last night, but the SVG that is produced starts 1000 pixels away from the origin and is then translated back to the center:
<svg
   xmlns:svg="http://www.w3.org/2000/svg"
   xmlns="http://www.w3.org/2000/svg"
   version="1.1"
   width="10"
   height="10">
  <g transform="translate(0,-1042.3622)">
    <path
       d="m 239.99999,318.07648 a 34.285713,37.142857 0 1 1 -68.57142,0 34.285713,37.142857 0 1 1 68.57142,0 z"
       transform="matrix(0.14380379,0,0,0.13275542,-24.582993,1005.1358)"
       style="fill:#d40000;fill-opacity:1;stroke:#000000;stroke-width:1;stroke-miterlimit:4;stroke-opacity:1;stroke-dasharray:none" />
  </g>
</svg>
For a small, icon-sized SVG that seems silly. Also in there is a circle with 30+ pixel radius that us then transformed to fit inside a 10x10 pixel frame of reference. Again, this bothers me—partially because additional math gets harder because of these matrixes and transforms, partly because the 1 pixel wide stroke around the object is barely visible when shrunk, but mostly because it seems so completely unnecessary.

Simplify


One way to simplify the resulting SVG is to use Inkscape's “Simplify” feature for paths. After I scale and move my object to the correct location on my 10x10 document:


I choose Path → Simplify, then save the SVG, which results in:
<svg
   xmlns:svg="http://www.w3.org/2000/svg"
   xmlns="http://www.w3.org/2000/svg"
   version="1.1"
   width="10"
   height="10">
  <g transform="translate(0,-1042.3622)">
    <path
       d="m 9.7494748,1047.3354 c 0.027392,1.8967 -1.2204621,3.7206 -2.9909977,4.3951 -1.7387873,0.7079 -3.8728512,0.2425 -5.150298,-1.1367 -1.33070755,-1.3565 -1.68575613,-3.5433 -0.86294089,-5.2541 0.76651319,-1.6943 2.60602119,-2.8204 4.46410649,-2.7235 1.9127635,0.046 3.7001042,1.3877 4.2919905,3.2045 0.1650043,0.4868 0.2484206,1.0008 0.2481396,1.5147 z"
       style="opacity:0.89000029;fill:#d40000;fill-opacity:1;stroke:#000000;stroke-width:0.59033614;stroke-miterlimit:4;stroke-opacity:1;stroke-dasharray:none" />
  </g>
</svg>
That does not appear to be a huge win. On the one hand, I no longer have that confusing transform attribute. On the other hand, the draw attribute is much, much bigger. Also, I still have that pesky translate on the <g> group tag.

One option here is to use the XML Editor in Inkscape to move the <path> out of the <g> tag so that that the path is a direct child of the <svg> tag itself. If I do that, and then “Simplify,” I get a path without transform (though still a confusing path).

It is not until I get a comment on last night's post from Emanuele Sabetta that I fully realize what I am doing by moving the path out of the group. In fact, I am moving my current object out of Inkscape's current layer and manually placing it in the root layer. Furthermore, Emanuele suggests doing just that—drawing in the root layer—as the best approach for simple SVG icons.

Armed with this knowledge, I start anew.

Drawing in the Root Layer


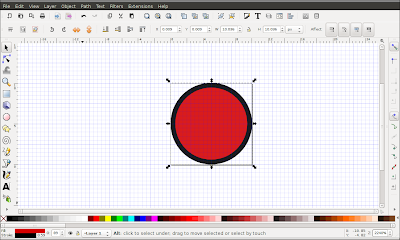
I choose File → New → icon_16x16 as the closest to what I want. I show the grid (shortcut is #), the Fill and Stroke controls (shortcut is Ctrl Shift F), and the Layer controls (shortcut is Ctrl Shift L). The result is something like:


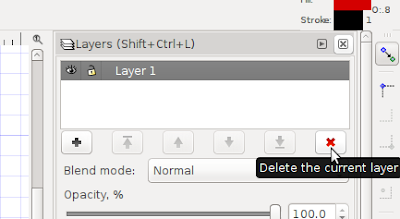
The first thing I do, per Emanuele's advice, is delete the current layer from the Layer controls:


Now, my drawing goes right in the root layer, which should simplify things from the outset.

Next, I select the create circle tool:


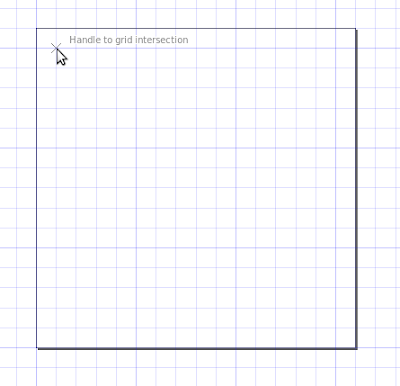
The reason that I began with the grid showing was so that I knew where to first start drawing my circle. Since I am going to have a stroke (outline) around the circle, I do not want the drawing to start exactly on the corner of my 16x16 drawing area—the stroke would wind up outside. Instead, I begin by clicking one grid down and one over:


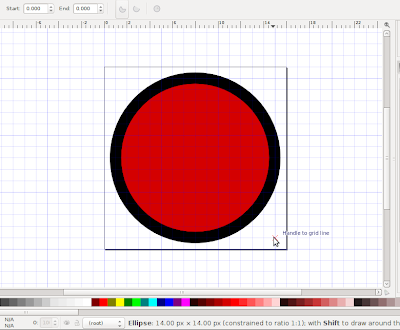
I then drag to the opposite side, holding the Ctrl key to constrain the drawing to a circle:


When I save that as plain SVG (not Inkscape SVG), I get the much, much simpler:
<svg
   xmlns:svg="http://www.w3.org/2000/svg"
   xmlns="http://www.w3.org/2000/svg"
   version="1.1"
   width="16"
   height="16">
  <path
     d="M 15,8 A 7,7 0 1 1 1,8 7,7 0 1 1 15,8 z"
     style="fill:#d40000;fill-opacity:1;stroke:#000000;stroke-width:1;stroke-miterlimit:4;stroke-opacity:1;stroke-dasharray:none" />
</svg>
That is exactly what I have been trying to get all along, so yay!

Huge thanks (again) to Emanuele for the pointers. Between those and learning from my own dumb mistakes, I may finally be getting the hang of this Inkscape thing. I am unsure if there is a way to draw a circle, then resize it so that the resulting drawing path is this simple. That is probably not a common use case as people will more often than not want more complex shapes that require complex paths anyway. For those, the “Simplify” option will likely come in handy. I will pick back up with that tomorrow for some other toppings for my <x-pizza> custom Polymer element. I also need to rethink where my SVG assets go as things are changing in Dart Pub. But that's for tomorrow.

For tonight, yay!


Day #67