Saturday, June 30, 2012

Gladius Code Cleanup

‹prev | My Chain | next›

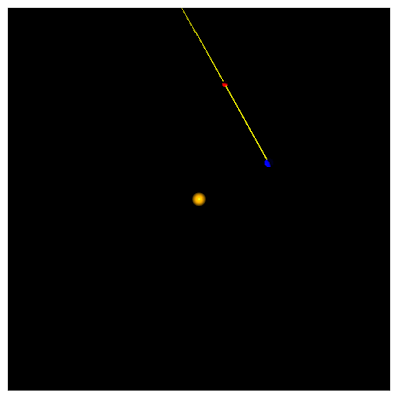
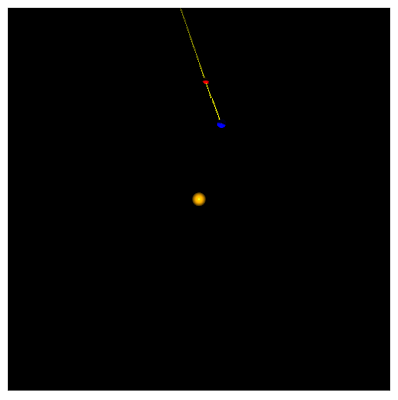
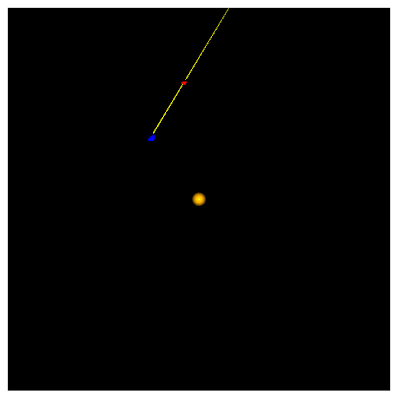
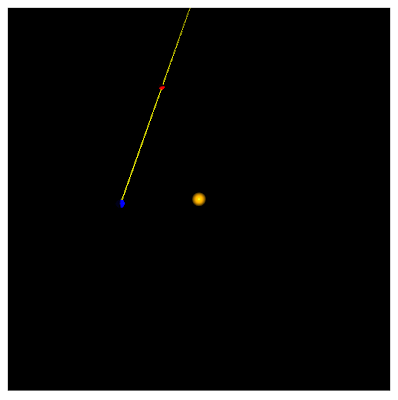
Up tonight, some code clean-up in my retrograde example done in Gladius. For the most part, I have tried to stick to idiomatic Gladius. But, since I am learning this from scratch, I can not claim to know what that means. Luckily, Alan Kligman of Gladius fame provided a gist of how he might clean up my example.

The most obvious thing that he did was to move the Sun to (0,0,0) in my example. I had adapted this from one of the original cube examples in Gladius. There was not nearly as much going on in the original example, so it did not matter the origin. In my sample, I have to translate everything 20 pixels away from the origin which is where the camera sits.

This converts nearly all entities from:
    var sun = new engine.simulation.Entity( "sun",
      [
        new engine.core.Transform( [0, 0, 20], [0, 0,0], [.5,.5,.5] ),
        new cubicvr.Model( resources.mesh, resources.sun_material )
      ]
    );
To something a little simpler:
    var sun = new engine.simulation.Entity( "sun",
      [
        new engine.core.Transform(),
        new cubicvr.Model( resources.mesh, resources.sun_material )
      ]
    );
The planet definitions (I only have Mars and the Earth to demonstrate retrograde motion) still retain the non-empty initial transform, but now only to resize and set the orbital distance:
space.add( new engine.simulation.Entity( "mars-orbital-center",
      [
        new engine.core.Transform()
      ]
    ));
    space.add( new engine.simulation.Entity( "mars",
      [
        new engine.core.Transform( [marsDistance, 0, 0], [0,0,0], [.2,.2,.2]),
        new cubicvr.Model( resources.mesh, resources.mars_material )
      ],
      [],
      space.findNamed( "mars-orbital-center" )
    ));
The primary difference in this updated code is that I am declaring the orbit center of Mars directly in the definition of the Mars entity definition. The third argument to an Entity constructor is a list of tags. I have yet to determine the utility of defining tags, so I leave it an empty list. But the fourth argument is the parent to the entity. This becomes the new frame of reference for the entity, not (0,0,0) with no rotation. The main benefit of doing this is that I can rotate the frame of reference, "mars-orbital-center" and Mars will revolve around its parent. This is how I make Mars and the Earth orbit the Sun.

The hardest part of this fairly simple refactoring turns out to be the debugging. When I actually rotation the orbital centers of the planets, I had left the old names of "center-of-mass" in place:
var marsRevolution = new engine.math.Vector3( space.findNamed( "mars-center-of-mass" ).findComponent( "Transform" ).rotation );
This resulted in an unhelpful error in the JavaScript console of:
Uncaught Error: already completed gladius-core.js:3168
I had no recourse but to comment out half the code until I tracked down the source of the problem. Hopefully, simple coding mistakes like this become more obvious in the future as Gladius evolves.

Day #433

Friday, June 29, 2012

Pointing Cameras in Gladius

‹prev | My Chain | next›

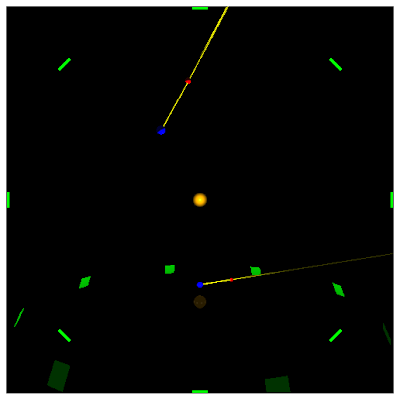
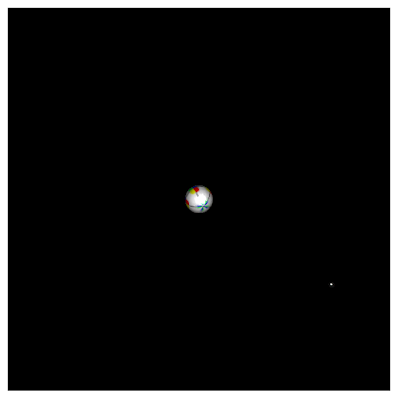
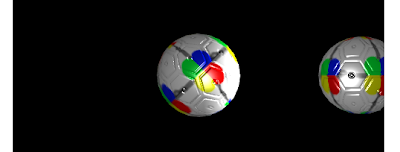
Having hacked together a way to switch cameras in Gladius, I am ready to try to better position one of those cameras. In my solar system simulation, my view of Earth's night sky is not sufficient to witness retrograde motion of Mars:


To better see this, I need to point my "Earth Camera" not directly at the night sky (i.e. away from the Sun), but at Mars.

Since I am already calculating the absolute (i.e. not relative to anything else) position of both Mars and the Earth, I can position the camera absolutely as well:
      space.
        findNamed("camera2").
        findComponent("Transform").
        setPosition([earthX, earthY, 19.5]);
Earth is actually at z=20, so by positioning the camera at z=19.5, I am viewing from slightly above the earth.

Similarly, since I am already calculating the angle between the Earth and Mars (to draw the line of sight marker), I can use this to rotate the camera to fixate on Mars:
      space.
        findNamed("camera2").
        findComponent("Transform").
        setRotation([3*Math.PI/2, 0, Math.PI -angle]);
With that, I can finally witness a decent retrograde motion from Earth.


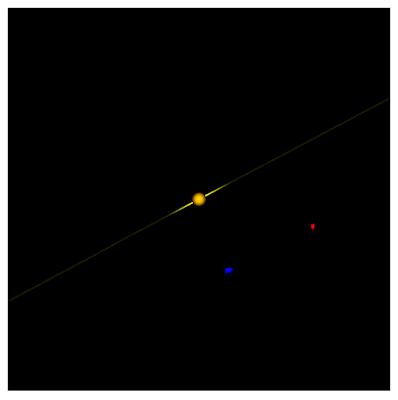
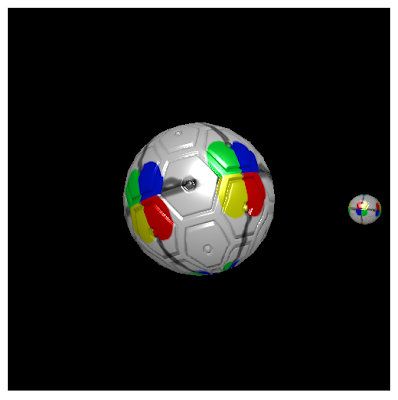
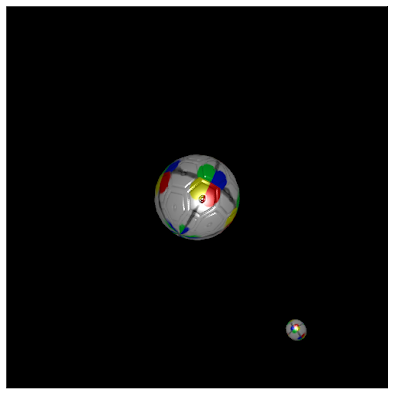
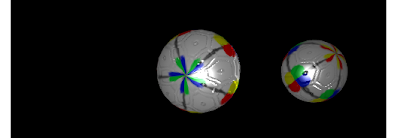
Mars normally moves to the left (eastward):


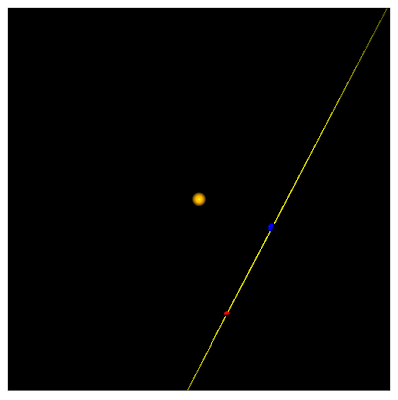
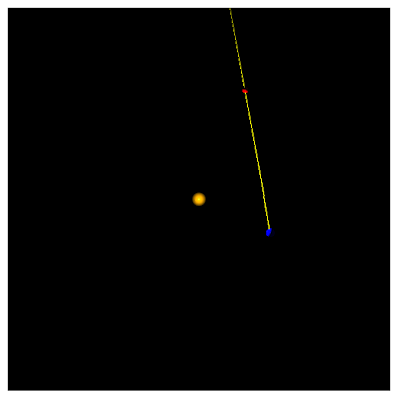
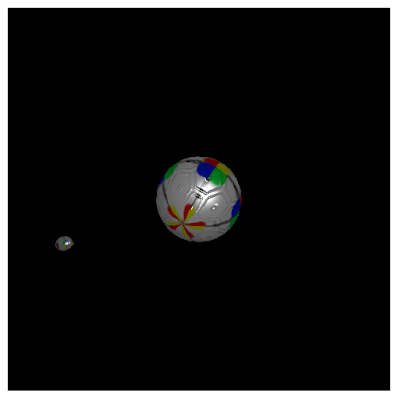
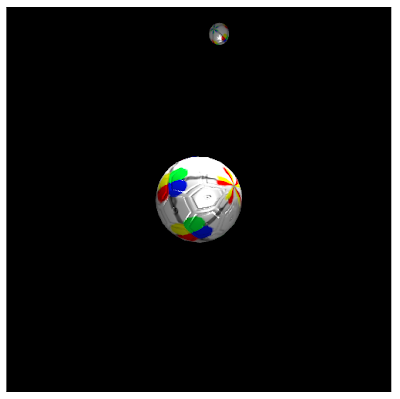
But, when the Earth passes it in its orbit, it seems to shift back:

I had hoped to be able to fix the camera to the Earth's frame of reference—the position could then be (0, 0, -1) or something similarly easy. Unfortunately computing the proper angles given the Earth's frame of reference and the actual angle between Earth and Mars proved too challenging for me.

It would also be nice to be able to make use of lookAt() in CubicVR.js. I may give that a try another night. For now, I am just happy to actually have retrograde motion showing.


Day #432

Thursday, June 28, 2012

Setting the Camera in Gladius

‹prev | My Chain | next›

I really need to begin investigating the latest version of Gladius. But first, I would like to tackle two problems. One is switching between cameras and the other is targeting a moving object. I think the latter is the harder problem, but since I already started the former last night, I continue now.

I found last night that I could find all Gladius entities with a camera via:
space.findAllWith("Camera");
Furthermore, I was able to remove a camera from an entity with:
var camera = camera_entity.removeComponent("Camera");
Removing a camera from an entity had the desirable side-effect of disabling the camera. Without doing so, multiple cameras would all display at the same time, in the same space. This makes for confusing viewing:


I also found that I could reactivate a camera by adding it back to it original "entity":
camera_entity.addComponent(camera);
Tonight, I would like to take a page from CubicVR.js by adding a setCamera() method to the Space class. I am not ready to add this directly to the Gladius source, so I opt instead for some JavaScript monkey-patching. I have a space object on which I am doing the bulk of the work in my game. So I grab that object's prototype so that I can add setCamera() to it:
    var spacePrototype = Object.getPrototypeOf(space);

    spacePrototype.setCamera = function(camera_name) {
    }
I start this method by disabling all active cameras:
    spacePrototype.setCamera = function(camera_name) {
      this._deactivateAllCameras();
    }
As mentioned, deactivating cameras is as simple as removing the component from its Gladius "entity". So that I can reactivate it later, when I remove each camera, I store it in a private _inactive_cameras instance variable:
    spacePrototype._deactivateAllCameras = function() {
      if (typeof(this._inactive_cameras) == "undefined") {
        this._inactive_cameras = {};
      }

      var all_cameras = this.findAllWith("Camera");
      for (var i=0; i<all_cameras.length; i++) {
        var name = all_cameras[i].name;
        this._inactive_cameras[name] = all_cameras[i].removeComponent("Camera");
      }
    };
In there, I use Space's findAllWith() method just like I did last night. Since I am working on the Space prototype, I am free to refer to the object as this.

With all cameras inactive, I need to activate one of them back in setCamera():
    spacePrototype.setCamera = function(camera_name) {
      this._deactivateAllCameras();

      this.
        findNamed(camera_name).
        addComponent(this._inactive_cameras[camera_name]);

      delete this._inactive_cameras[camera_name];
    };
With that, I can activate one camera with:
space.setCamera("camera2");
Resulting in a single camera view:


And, if I want all of the functionality from the CubicVR.js example, I can switch between cameras ever 240 clock ticks:
    var task = new engine.FunctionTask( function() {
      if (space.clock.time % 240 == 0) {
        space.setCamera(space.camera.name == "camera1" ? "camera2" : "camera1");
      }
      // move the planets ...
    }

That will suffice for now (until Gladius supports this more directly). Up tomorrow, I see if I can get a moving camera to target a moving object.


Day #431

Wednesday, June 27, 2012

Disabling Cameras in Gladius

‹prev | My Chain | next›

Last night I was able to get a second Gladius camera added to my solar system simulation. I had meant to be able to switch between the two cameras but it turned out that I did not need to—I could watch both cameras at the same time:


That helped to identify what I was doing wrong, but I would still like to figure out how to switch between cameras rather than seeing two (or more) at the same time.

As mentioned yesterday, there is a CubicVR.js simulation that switches cameras. Since Gladius uses CubicVR.js as its rendering backend, I ought to be able to achieve the same effect in my Gladius example.

In the source for the example, there is a call to scene.setCamera() that effects the desired camera shift. I search through the Gladius source for something similar, but for naught. I had not really expected to find such a thing—if it had existed, then I would be hard pressed to explained both camera angles showing at the same time.

Digging further, I find that the gladius-cubicvr renderer does appear to render all cameras:
      // Render the space for each camera
      for( i = 0, l = cameraEntities.length; i < l; ++ i ) {
        var camera = cameraEntities[ i ].findComponent( "Camera" );
        // Render camera + objects
      }
The only thing that I can think to do is trick findComponent() into not seeing one or more of the cameras.

So I try to set the Gladius Entity containing the camera to inactive:
space.findNamed( "camera1" ).setActive(false);
That has no effect.

Next I try to actually remove the camera:
var thing = space.findNamed( "camera1" ).removeComponent("Camera");
That does have the desired outcome as only one view is now present:


I can even re-add the camera if needs be:
space.findNamed( "camera1" ).addComponent(thing);
I am not certain that is the best way to go about doing it, but it works.


Day #430

Tuesday, June 26, 2012

Multiple Cameras in Gladius

‹prev | My Chain | next›

I seem to have stumbled on something of a bug in Gladius or its rendering backend CubicVR.js. More likely, I am just doing something wrong.

Whatever the reason, I am seeing different things when I place a camera above my solar system simulation than I do when I place the camera above the Earth. In the former I see the expected retrograde motion. In the latter, I do not. This could a bug somewhere in the Gladius stack, but I think it more likely that I am doing something wrong.

So instead of using the same Gladius "camera" and placing it differently between page loads, I am going to try to use two different cameras and switch between the two. I know that CubicVR.js can handle this—it include a multi-camera simulation (source). The question is, can I do the same in Gladius?

I rename the original camera as "camera1". The remainder of the camera definition remains the same:
    space.add( new engine.simulation.Entity( "camera1",
      [
        new engine.core.Transform( [0, 0, 0] ),
        new cubicvr.Camera({
          targeted: true,
          fov: 75
        }),
        new cubicvr.Light()
      ]
    ));
(I don't believe that "fov" actually changes the field of view)

This gives me my expected above-the-solar-system view (with "constellation" markers):


I place the second camera 5 units behind the Earth and 2 above it:
    space.add( new engine.simulation.Entity( "camera2",
      [
        new engine.core.Transform( [-5, 0, -2], [3*Math.PI/2, 0, Math.PI/2]),
        new cubicvr.Camera(),
        new cubicvr.Light()
      ]
      [],
      space.findNamed( "earth" )
    ));
When I reload the page, something unexpected happens—the views from the two cameras are superimposed on each other:


The second view is really too close to Earth to see anything (and "fov" has no effect), so I move waaaay back:
    space.add( new engine.simulation.Entity( "camera2",
      [
        new engine.core.Transform( [-100, 0, -25], [3*Math.PI/2, 0, Math.PI/2]),
        new cubicvr.Camera({fov: 10.0}),
      ],
      ['@transform', '@camera', '@light'],
      space.findNamed( "earth" )
    ));
With that, I get a better view at the start of retrograde:


And after:


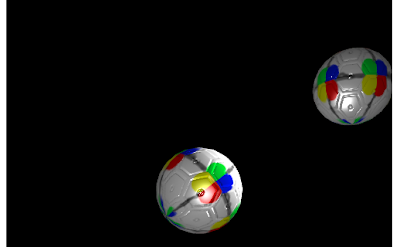
Even here it is difficult to spot the retrograde motion in the second camera (the view at the bottom). Normally Mars moves right-to-left, but in the above two it moves from left-to-right. The right-to-left movement mostly takes place when Earth revolution pushes Mars to the edge of vision.

So it seems that I need to come up with a better way to view Mars' retrograde motion from Earth's point of view. Likely I will have to fix the camera to Mars rather than straight out into space. It would also be good to figure out how to disable one or the other camera.


Day #429

Monday, June 25, 2012

Constellation Markers in Gladius

‹prev | My Chain | next›

After shifting camera angles in my retrograde motion simulation, I did not actually see the expected retrograde motion. I am unsure as to the explanation so I plan to add star markers (constellations) to help identify things.

There are 12 zodiac constellations, but 8 should suffice. So far in my Gladius exploration, I have avoided factory functions, preferring to create thing manually as I learned, but it is growing cumbersome. I cannot quite do away with those here, but hopefully I can use a for-loop instead of 8 separate constellation creation steps.

Part of the reason that I do all of this manually is that mesh and material have to be loaded from separate files in the early stages of Gladius. This has not changed, so I create a new "planar" mesh procedure in procedural-planar-mesh.js:
function proc( options ) {

  options = options || {};
  options.size = options.size || 1.0;

  var mesh = {
    primitive: {
      type: "plane",
      sine: options.size,
      uv: {
        projectionMode: "planar",
        projectionAxis: "x"
      }
    },
    compile: true
  };

  return mesh;
}
I load those into the resources supplied to my "game":
  var resources = {};

  engine.get(
    [
      // constellations
      {
        type: engine["gladius-cubicvr"].MaterialDefinition,
        url: '../assets/rgb-material.js?g=255',
        load: engine.loaders.procedural,
        onsuccess: function( material ) {
          resources.constellation_material = material;
        },
        onfailure: function( error ) {
        }
      },
      {
        type: engine["gladius-cubicvr"].Mesh,
        url: '../assets/procedural-planar-mesh.js',
        load: engine.loaders.procedural,
        onsuccess: function( mesh ) {
          resources.constellation_mesh = mesh;
        },
        onfailure: function( error ) {
        }
      },
    ],
    {
      oncomplete: game.bind( null, engine, resources )
    }
  );
With a simple green, square mesh/material ready for the constellations, I add eight of them to the game space:
    for (var i=0; i<8; i++) {
      // frame of reference for constellation # i
      space.add( new engine.simulation.Entity( "constellation-frame-" + i,
         [
           new engine.core.Transform( [0, 0, 20], [0, 0, (i/8)*2*Math.PI] )
        ]
      ));

      // add constellation # i to space with frame of reference as parent
      // (parent is fourth argument to Entity constructor)
      space.add( new engine.simulation.Entity(
        "constellation-" + i,
        [
          new engine.core.Transform( [20, 0, 0], [0,Math.PI/2,0], [1,1,1]),
          new cubicvr.Model( resources.constellation_mesh, resources.constellation_material )
        ],
        [],
        space.findNamed( "constellation-frame-" + i )
      ));
    }
For each of the 8 "constellations", I start with a frame of reference that is rotated around the z-axis by eighths. Each constellation is added to the same place (20, 0, 0) in space, but is then spaced evenly around the Sun by virtue of being attached to the rotated frame of reference.

The result is 8 reference constellations:


Both Mars and the Earth revolve counter-clockwise around the Sun. But, as the Earth passes Mars, Mars seems to move backwards as seen by Earth:


But when I switch the camera to follow along from Earth's point of view (looking out into space), I continue to see the same thing as last night. Mars seems to move uninterrupted:


... as the Earth passes it:


I am a bit bewildered by this. I had really expected to see something obvious when I added constellation markers. I think tomorrow, I need to add dynamic switching between camera angles. I had wanted to explore that soon anyway. So much the better if it can help troubleshoot this.


Day #428

Sunday, June 24, 2012

Changing Camera Reference in Gladius

‹prev | My Chain | next›

As of last night, I have a nice Gladius based simulation of planetary retrograde motion:


Retrograde motion is one of those things that baffled ancient astronomers, who watched the heavens night after night as planets sometime did odd things. Over the course of months, Mars moves through different constellations as it revolves around the Sun. But every now and then, as the Earth passes Mars in its orbit, Mars seems to go backward. That is it might move normally from Pisces, to Aries, to Taurus and then back to Aries.

It is easily explained with a heliocentric view of the solar system, but ancient astronomers assumed the Earth to be the center of the universe. Hence the bafflement.

We can laugh at our ancestors as simpletons. But for a false assumption, they were in many way far more sophisticated in understanding of the skies. Very rarely are many of use afforded the chance for a clear view of the stars, let alone do we take detailed notice of what transpires. In that sense we have the opposite problem of our ancestors—we have a good explanation of things like retrograde motion, but it is difficult for us to visualize what it might look like.

Gladius to the rescue.

My simulation currently show retrograde motion from "above" the solar system (looking down on the northern hemisphere). Today I hope to shift the view to Earth looking out into space (away from the Sun).

So far I have yet to change from the camera angle in the cube example in Gladius. That is, the camera is established to look at 0,0,0 from the outset:
    space.add( new engine.simulation.Entity( "camera",
      [
        new engine.core.Transform( [0, 0, 0] ),
        new cubicvr.Camera({
          targeted: true
        }),
        new cubicvr.Light()
      ]
    ));
Instead, I shift the camera to Earth, rotate it 90° and move it back and above Earth:
    space.
      findNamed( "camera" ).
      setParent( space.findNamed( "earth" ) );

    space.
      findNamed( "camera" ).
      findComponent("Transform").setRotation([3*Math.PI/2, 0, 0]);

    space.
      findNamed( "camera" ).
      findComponent( "Transform" ).
      setPosition( [0, 5, -1] );
That should give me a nice view as Mars moves across the sky. Only is doesn't.

Since I am fixed to Earth, the camera ends up spinning with Earth. I see Mars every now and then:


But I am not seeing retrograde motion.

Ah, shoot. I think I need to add reference points in the sky -- constellations if you will. I had thought that I could witness retrograde motion without them, but it seems not. I will pick back up there tomorrow.

Day #427

Saturday, June 23, 2012

Retrograde Motion in Gladius

‹prev | My Chain | next›

Before Galileo and the telescope, there were still motions in the heavens that baffled ancient astronomers. These were not dumb people by any stretch of the imagination, rather they were limited in their worldly (heavenly?) view. In other words, they lacked Gladius and CubicVR.js.

One of the things that defied explanation was the apparent retrograde motion of the outer planets. As planets revolve about the Sun over the course of months and years, they move in the sky. Over the course of time, they move eastward relative to the stars. But, every now and then, they switch direction and move westward for a few weeks or so. This was really hard to explain with the Earth at the center of the universe, but is easy to visualize with the Earth and other planets revolving around the Sun.

I already have Mars and the Earth revolving around the Sun. To visualize retrograde motion, I need to draw the line-of-sight from the Earth to Mars and out into space. I am using a very thin cylinder as the line. Now I need to figure out how to draw the line in Gladius.

First, I need to where both Mars and Earth are. I cannot simply ask for the X-Y coordinates of both planets, because their coordinates are fixed, but their frames of references are rotated. So I start by determining the amount of rotation of each:
      var marsRevolution = new engine.math.Vector3(
        space.
          findNamed( "mars-center-of-mass" ).
          findComponent( "Transform" ).
          rotation
      );

      var earthRevolution = new engine.math.Vector3(
        space.
          findNamed( "earth-center-of-mass" ).
          findComponent( "Transform" ).
          rotation 
      );
With the angles of rotation, I can get the X-Y location with simple trigonometry. The difference between Mars' and Earth's coordinates is then easy to calculate:
      var earthX = Math.cos(earthRevolution[2]) * earthDistance
        , earthY = Math.sin(earthRevolution[2]) * earthDistance
        , marsX =  Math.cos(marsRevolution[2]) * marsDistance
        , marsY = Math.sin(marsRevolution[2]) * marsDistance
The difference in X-Y coordinates can then be used to determine the angle by which the line of sight needs to rotate thanks to the awesome power of atan2():

      var y_diff = marsY - earthY
        , x_diff = marsX - earthX
        , angle = Math.atan2(x_diff, y_diff);
Finally, I rotate the line of sight marker by that angle:
      line_of_sight.
        findComponent( "Transform" ).
        setRotation( [0,0,-angle] );
The result is:


The angle is correct, but the line goes through the Sun instead of starting from the Earth and running through Mars. First, I move the line-of-sight marker to the Earth:
      line_of_sight.
        findComponent( "Transform" ).
        setPosition( [earthX, earthY, 20] );
With that, the line of sight is now running through Mars and the Earth:


To shift it so that it starts on the Earth and runs through Mars, I need a bit more trig (the cylinder is 50 units long, so I shift it by half):
      line_of_sight.
        findComponent( "Transform" ).
        setPosition( [earthX + 25*Math.sin(angle), earthY + 25*Math.cos(angle), 20] );
And now, I can finally witness retrograde motion. Mars starts at a point in the sky that is to the right of the mid-point:


As both Mars and the Earth revolve about the Sun, Mars's position in the sky continues to move to the left:


But, as the Earth overtakes Mars, Mars slows:


And then seems to travel backwards:


Before resuming its leftward / eastward movement:


That's pretty cool. When I first learned Java waaaay back in the day, I made a similar visualization. At the time I made an "applet" which is how old people used to make Flash visualizations before canvas. I think it may have been easier back then (I was certainly more proficient at trigonometry). But the visualization was limited to two dimensions. Now I have three dimensions available to me, which I will start exploring tomorrow.


Day #426

Friday, June 22, 2012

Dynamic Position in Gladius

‹prev | My Chain | next›

I do not know how to make a line in Gladius or CubicVR.js. If there is a drawLine() method to be found, it eludes me. This presents a problem because I would like to draw a line between the Earth and Mars in my very simple solar system simulation:


The nearest thing that I can think to do is add a line-like primitive shape to the drawing. I could do a very narrow plane, but that has the disadvantage of being thin to the point of invisibility when viewed horizontally. So I opt for a very thin cylinder instead. I define a "procedural" mesh (I really should figure out how to create a Galdius mesh without an external proc() function) as procedule-line-mesh.js:
function proc( options ) {
  options = options || {};
  options.size = options.size || 0.01;

  return {
    primitive: {
      type: "cylinder",
      radius: options.size
    },
    compile: true
  };
}
From the main script entry point, I then load this mesh, along with a yellow material, into the resources hash to be used in the "game":
  engine.get(
    [
      // ...
      // line between Earth and Mars
      {
        type: engine["gladius-cubicvr"].MaterialDefinition,
        url: '../assets/rgb-material.js?r=255&g=255',
        load: engine.loaders.procedural,
        onsuccess: function( material ) {
          resources.line_material = material;
        },
        onfailure: function( error ) {
        }
      },
      {
        type: engine["gladius-cubicvr"].Mesh,
        url: '../assets/procedural-line-mesh.js',
        load: engine.loaders.procedural,
        onsuccess: function( mesh ) {
          resources.line_mesh = mesh;
        },
        onfailure: function( error ) {
        }
      },
    ],
    {
      oncomplete: game.bind( null, engine, resources )
    }
  );
This may be something easier to do in the newer version 0.2 of Gladius, but, for now, I have to got through the ceremony of loading CubicVR Material and Mesh objects from external sources since Gladius does not grant direct access to these classes. As it is, I have nearly a dozen such definitions—each doing no more than defining a color or mesh.

Anyhow, with mesh (shape) and material in tow I can add my cylinder-line to the game space:
    space.add( new engine.simulation.Entity( "earth-mars-line-of-sight",
      [
        new engine.core.Transform( [0, 0, 0], [0,0,0], [1,1,1]),
        new cubicvr.Model( resources.line_mesh, resources.line_material )
      ]
    ));
Lastly, I shift it to the Earth's frame of reference and point it out to space (away from the Sun) by rotating it 90°:
    var line_of_sight = space.findNamed( "earth-mars-line-of-sight" );
    line_of_sight.setParent( space.findNamed( "earth" ) );
    line_of_sight.findComponent("Transform").setRotation([Math.PI/2, 0, 0]);
The result is:


I am also greeted by many warning to the effect that:
PERFORMANCE WARNING: Attribute 0 is disabled. This has signficant performance penalty 
I am unsure about this as it seems related to the mere presence of the cylinder independent of size, location or frame of reference. My machine is not impacted, so I ignore this for now.

Currently, the line that should point to Mars points straight out to space. To point to Mars, I need to know where Mars is in space and adjust the coordinates accordingly. Unfortunately, I cannot simply grab the x-y-z position of Mars:
      var marsPosition = new engine.math.Vector3( space.findNamed( "mars" ).findComponent( "Transform" ).position );
      console.log(marsPosition);
This results in [10,0,0] at every clock cycle. This is because the position of Mars does not change. Last night, I set the frame of reference in motion (individually for each planet) while everything else stayed fixed.

I am not going to solve this completely tonight, but I get started by computing the X-Y position by pulling the angle out of Mars' frame of reference and applying some simple trigonometry to determine the absolute position:
      var marsPosition = new engine.math.Vector3( space.findNamed( "mars" ).findComponent( "Transform" ).position );
      var marsDistance = Math.sqrt(marsPosition[0] * marsPosition[0] + marsPosition[1] * marsPosition[1]);

      console.log("X: " + Math.cos(marsRevolution[2]) * marsDistance);
      console.log("Y: " + Math.sin(marsRevolution[2]) * marsDistance);
I will pick back up tomorrow doing the same with Earth. Then the fun begins as I have to rotate the cylinder line as the planets orbit.

Day #425

Thursday, June 21, 2012

A Gladius Solar System

‹prev | My Chain | next›

Up tonight, I would like to make my little astronomical simulation a little more sophisticated. Instead of a moon revolving around a planet, I would like to have two planets revolving around the Sun.

The Sun, and each planet can be represented as a simple sphere with different colors. I already have the sphere

To generate different colors, I define an RGB procedural material file:
function proc( options ) {
  options = options || {};
  var r = (options.r || 0)/ 255,
      g = (options.g || 0)/ 255,
      b = (options.b || 0)/ 255;

  return {
    color: [r, g, b]
  };
};
Back in the main app, I invoke the materials as:
  engine.get(
    [
      // ...
      {
        type: engine["gladius-cubicvr"].MaterialDefinition,
        url: '../assets/rgb-material.js?r=204',
        load: engine.loaders.procedural,
        onsuccess: function( material ) {
          resources.mars_material = material;
        },
        onfailure: function( error ) {
        }
      }
    ],
    {
      oncomplete: game.bind( null, engine, resources )
    }
  );
As I found last night, it is best to generate point light sources in Gladius. Obviously the Sun needs to function as a light source:
    space.add( new engine.simulation.Entity( "sun-light",
      [
        new engine.core.Transform( [0, 0, 20], [0, 0, 0], [1, 1, 1] ),
        new cubicvr.Light(
          new cubicvr.LightDefinition({
            intensity: 3,
            distance: 30
          })
        )
      ]
    ));
I also need a light source to illuminate the Sun itself, so I add a point light source just "above" the Sun:
    space.add( new engine.simulation.Entity( "sun-glow",
      [
        new engine.core.Transform( [0, 0, 18], [0, 0, 0], [1, 1, 1] ),
        new cubicvr.Light(
          new cubicvr.LightDefinition({
            intensity: 3,
            distance: 3
          })
        )
      ]
    ));
Lastly, I need to make the planets revolve. I copy the rotating frame of reference that comes in the cubes example from Gladius by adding the planet along with the planet's center of mass inside the Sun:
    space.add( new engine.simulation.Entity( "earth-center-of-mass",
      [
        new engine.core.Transform( [0, 0, 20], [engine.math.TAU, engine.math.TAU, engine.math.TAU] )
      ]
    ));
    space.add( new engine.simulation.Entity( "earth",
      [
        new engine.core.Transform( [7.5, 0, 0], [0,0,0], [.5,.5,.5]),
        new cubicvr.Model( resources.mesh, resources.earth_material )
      ]
    ));
After doing the same for Mars, I need to associate both frames-of-references / centers-of-mass with their planets:
    space.findNamed( "mars" ).setParent( space.findNamed( "mars-center-of-mass" ) );
    space.findNamed( "earth" ).setParent( space.findNamed( "earth-center-of-mass" ) );
And set them in motion (Mars a little slower than the Earth, of course):
      var marsRevolution = new engine.math.Vector3( space.findNamed( "mars-center-of-mass" ).findComponent( "Transform" ).rotation );
      marsRevolution = engine.math.vector3.add( marsRevolution, [0, 0, space.clock.delta * 0.0004] );
      space.findNamed( "mars-center-of-mass" ).findComponent( "Transform" ).setRotation( marsRevolution );

      var earthRevolution = new engine.math.Vector3( space.findNamed( "earth-center-of-mass" ).findComponent( "Transform" ).rotation );
      earthRevolution = engine.math.vector3.add( earthRevolution, [0, 0, space.clock.delta * 0.0006] );
      space.findNamed( "earth-center-of-mass" ).findComponent( "Transform" ).setRotation( earthRevolution );
The result:

It feels like a lot of work to describe something so natural. Much of that is, no doubt, my inexperience with everything. I am manually creating planets when I should have a function / factory doing that. I can fix that another day. Lighting the Sun feel wrong. I do wonder if there is a way for it to glow on its own. If I move the camera around, I either need to move the light or add other lights all around the Sun. Things to worry about another day.

Day #424

Wednesday, June 20, 2012

Various Lighting in Gladius

‹prev | My Chain | next›

I finally got lighting more or less working in Gladius last night. I am curious if it is actually "more" or "less".

I ended with a light definition of:
    var lightDefinition = new cubicvr.LightDefinition({
      intensity: 20,
      distance: 20,
      light_type: cubicvr.LightDefinition.LightTypes.POINT,
      method: cubicvr.LightDefinition.LightingMethods.DYNAMIC
    })
Which produced a decently lit scene:


I wonder if a different light type might produce different / better results. So I switch from POINT to DIRECTIONAL:
    var lightDefinition = new cubicvr.LightDefinition({
      light_type: cubicvr.LightDefinition.LightTypes.DIRECTIONAL,
      method: cubicvr.LightDefinition.LightingMethods.DYNAMIC,
      intensity: 20,
      distance: 30
    })
But end up with:


Not ideal by any imagination. I try several variation of intensity, distance and even direction without any change in this dimly lit scene.

Unfortunately it is better than others. AREA, for instance results in:
Uncaught Error: already completed 
It seems best to stay on the lighting happy path of POINT. At least for now.

Day #424

Tuesday, June 19, 2012

Lights in Gladius

‹prev | My Chain | next›

With an improved understanding of transforms in Gladius and CubicVR.js, I turn my attention instead to light sources.

I have removed a revolving light source leaving only the one defined along with the camera:
    space.add( new engine.simulation.Entity( "camera",
      [
        new engine.core.Transform( [0, 0, 0] ),
        new cubicvr.Camera({
          targeted: true
        }),
        new cubicvr.Light()
      ]
    ));
When the objects are close up (3 units away), the light is fairly bright:


When I double the distance, the reflection off the surfaces is significantly dimmed:


And when I move the objects 20 units away, the reflection from the light is very dim indeed:


All of that is to be expected, of course. The further objects in the real world are from a light, the harder they are to be seen. But, I the light source is made brighter:
    space.add( new engine.simulation.Entity( "camera",
      [
        new engine.core.Transform( [0, 1, -1] ),
        new cubicvr.Camera({
          targeted: true
        }),
        new cubicvr.Light({
          direction: [1,1,-1],
          type: "area",
          distance: 20.0,
          intensity: 200.0
        })
      ]
    ));
Then even the distant objects should be much brighter. Except there is no change:


I am at a loss to explain this. Fiddling with any CubicVR Light and Camera seemingly has no effect. Perhaps this has something to do with being the first light / camera added?

To answer that, I can add another light. The trouble is, if I continue to add lights with the same constructor arguments as above, there is no change. So I borrow from the light definition in the original Gladius samples, which use a second class LightDefinition:
    var lightDefinition = new cubicvr.LightDefinition({
      intensity: 20,
      distance: 20,
      light_type: cubicvr.LightDefinition.LightTypes.POINT,
      method: cubicvr.LightDefinition.LightingMethods.DYNAMIC
    })

    space.add( new engine.simulation.Entity( "camera",
      [
        new engine.core.Transform( [0, 0, 0] ),
        new cubicvr.Camera({
          targeted: true
        }),
        new cubicvr.Light( lightDefinition )
      ]
    ));
With that, I finally get my faraway planets nice and shiny:


And, in fact, if I add that back to the original light:
    var lightDefinition = new cubicvr.LightDefinition({
      intensity: 20,
      distance: 20,
      light_type: cubicvr.LightDefinition.LightTypes.POINT,
      method: cubicvr.LightDefinition.LightingMethods.DYNAMIC
    })

    space.add( new engine.simulation.Entity( "camera",
      [
        new engine.core.Transform( [0, 0, 0] ),
        new cubicvr.Camera({
          targeted: true
        }),
        new cubicvr.Light( lightDefinition )
      ]
    ));
Then I again get the same nice light on my faraway object. If I attempt to put those same arguments back in the Light constructor:
    space.add( new engine.simulation.Entity( "camera",
      [
        new engine.core.Transform( [0, 0, 0] ),
        new cubicvr.Camera({
          targeted: true
        }),
        new cubicvr.Light({
          intensity: 20,
          distance: 20,
          light_type: cubicvr.LightDefinition.LightTypes.POINT,
          method: cubicvr.LightDefinition.LightingMethods.DYNAMIC
        })
      ]
    ));
Then again I am back to the very dark light source only. So it seems that, in Gladius, the LightDefinition class is pretty much a requirement.

Day #422

Monday, June 18, 2012

Rotating Frame of Reference

‹prev | My Chain | next›

I thought that I had figured out rotation and revolution in Gladius / CubicVR.js, but a comment from Alan Kligman, one of the Gladius maintainer, makes me think I may be mistaken.

Specifically, he indicates that revolution of the "moon" in my simulation is not tied to a global center of reference. Rather, it seems that the following code ties the moon (named "light-marker") to another object responsible for revolving:
space.findNamed( "light-marker" ).setParent( space.findNamed( "light-center" ) );
When this "light-center" rotates, the light market (and any other objects with "light-center" as the parent) rotate with it.

At least that is what I think Alan means.

So I simplify the remnants of the Gladius example to:
    space.add( new engine.simulation.Entity( "camera", /* ... */ ));
    space.add( new engine.simulation.Entity( "moon", /* ... */ ));
    var planet = new engine.simulation.Entity( "planet", /* ... */ );
    space.add( planet );

    var task = new engine.FunctionTask( function() {
      // rotate planet
      // rotate moon
    }, {
      tags: ["@update"]
    });
The result is that the moon now rotates about its z-axis but has no other motion:


In other words, this is how I had expected things to work yesterday before I convinced myself that Gladius / CubicVR.js worked otherwise.

I am much happier with this way of thinking. It is much easier to move individual objects without having to sync to a single frame of reference. But now that I have removed my previous parent object, the question becomes how can I make my moon more moon-like—without resorting to a light-center?

Now that I understand the dual-purpose of the light center, I think it makes a certain amount of sense. Instead of calling a light center, I relabel it a center of mass:
    space.add( new engine.simulation.Entity( "moon-center-of-mass",
      [
        new engine.core.Transform( [0, 0, 5], [engine.math.TAU, engine.math.TAU, engine.math.TAU] )
      ]
    ));
It is not a true center of mass, but it better captures what I want it to do. Perhaps something capturing the frame-of-reference nature of this point-without-material would be better. I will worry about naming another day. For now, I make this this parent to my "moon":
space.findNamed( "moon" ).setParent( space.findNamed( "moon-center-of-mass" ) );
And, instead of rotating the moon, I rotate the center of mass:
      var lightRotation = new engine.math.Vector3( space.findNamed( "moon-center-of-mass" ).findComponent( "Transform" ).rotation );
      lightRotation = engine.math.vector3.add( lightRotation, [0, 0, space.clock.delta * 0.001] );
      space.findNamed( "moon-center-of-mass" ).findComponent( "Transform" ).setRotation( lightRotation );
With that, I have my moon again revolving about its planet:


Much thanks to Alan for preventing me from laboring under a false assumption. Much better to correct that now than later when I had built much more understanding on faulty foundations.


Day #421

Sunday, June 17, 2012

Rotation in CubicVR.js

‹prev | My Chain | next›

I have learned quite a bit about Gladius and CubicVR.js over the past several days. There is still much that eludes me. Among the myriad of gaming and rendering tidbits that continues to baffle me is how things move.

Actually, I know how the objects rotate in the sample that I continue to evolve from one of the examples bundled with Gladius:


Both objects in that scene rotate. The large object in the center rotates in all directions, though it stays in the center of the scene. The smaller object rotates as it revolves about the central object—almost like a moon about a planet (except that this moon is also a light source shining on the planet).

As I mentioned, I know how the rotation works. First, the example grabs the rotation transform property from the object and casts it into a three dimensional vector object:
var cubeRotation = new engine.math.Vector3( space.findNamed( "cube" ).findComponent( "Transform" ).rotation );
(the "cube" in the variable name is an artifact of the original example)

Given the current angles of rotation, we add a little bit of rotation in the X direction, a little less in the Y direction, and a little more in the Z direction:
cubeRotation = engine.math.vector3.add( cubeRotation, [space.clock.delta * 0.003, space.clock.delta * 0.001, space.clock.delta * 0.0007] );
In the above, the space.clock.delta is the amount of time that has passed since the current animation task was last run. Even if the task is skipped for a cycle or two, the rate of rotation will remain fixed by virtue of moving a the same rate over time.

Lastly, the new rotation is applied to the object:
space.findNamed( "cube" ).findComponent( "Transform" ).setRotation( cubeRotation );
And it works. I can vary the components of the rotation vector and observe changes in how both objects rotate.

So I understand rotation, but I do not know how the "moon" revolves about the "planet". There is no corresponding setRevolution() method call for the moon. In every way that I can see, the movement of the moon / light source is nothing more than a simple rotation:
      var lightRotation = new engine.math.Vector3( space.findNamed( "light-center" ).findComponent( "Transform" ).rotation );
      lightRotation = engine.math.vector3.add( lightRotation, [0, space.clock.delta * 0.001, 0] );
      space.findNamed( "light-center" ).findComponent( "Transform" ).setRotation( lightRotation );
There are no other task() functions assigned to the Gladius engine. There is no mention of motion at all as far as I can tell. So...

My first inclination is that this is somehow a property of the light source. There is nothing that jumps out at me about the light source's definition:
    var lightDefinition = new cubicvr.LightDefinition({
      intensity: 2,
      light_type: cubicvr.LightDefinition.LightTypes.POINT,
      method: cubicvr.LightDefinition.LightingMethods.DYNAMIC
    })
    // ...
    space.add( new engine.simulation.Entity( "light-source",
      [
        new engine.core.Transform( [3, 0, 0], [0, 0, 0], [1, 1, 1] ),
        new cubicvr.Light( lightDefinition )
      ]
    ));
With nothing else to try, I mucking with the rotation. Instead of rotating about the Y-axis (up and down), I try rotation about the Z-axis:
      lightRotation = engine.math.vector3.add( lightRotation, [0, 0, space.clock.delta * 0.001] );
The result is that the "moon" / light source is now revolving up and down (around the Z-axis):


Ah. I had mistakenly assumed that moving the moon also created a new frame of reference about which the rotation took place. It seems that, although motion of objects is independent of each other, the frame of reference is not.

That actually clears up quite a bit for me.


Day #420

Saturday, June 16, 2012

Transform in CubicVR.js / Gladius

‹prev | My Chain | next›

Today, I play with position and motion properties in CubicVR.js, by way of the game engine Gladius, which uses CubicVR.js as a rendering backend.

In the examples that I have been playing with, there is a big object in the rotating in the center of the image with a smaller object of the same mesh / material revolving about it:


In addition to revolving, the smaller object serves to mark the location of second, moving light source for the image. This "light marker" object looks to be set initially with the following:
    space.add( new engine.simulation.Entity( "light-marker",
      [
        new engine.core.Transform( [3, 0, 0], [0, 0, 0], [0.1, 0.1, 0.1] ),
        new cubicvr.Model( resources.mesh, resources.material )
      ]
    ));
I think that the three arguments to the Transform constructor are location, rotation and size. The latter is easy enough to test:
    space.add( new engine.simulation.Entity( "light-marker",
      [
        new engine.core.Transform( [3, 0, 0], [0, 0, 0], [0.8, 0.8, 0.8] ),
        new cubicvr.Model( resources.mesh, resources.material )
      ]
    ));
This results in:


To test that the first argument is location, I set the y-coordinate to 2 instead of zero:
new engine.core.Transform( [3, 2, 0], [0, 0, 0], [0.8, 0.8, 0.8] ),
Now the light source is 2 units above the central object:


For the middle argument to the Transform constructor, I test that it is a rotation by first noting that the beach ball has green the top left corner of the dots. Following clockwise, blue is the top-right, red at the bottom right and yellow in the bottom left. I rotate the ball by 45° about the x-axis:
new engine.core.Transform( [3, 0, 0], [45, 0, 0], [0.8, 0.8, 0.8] )
This results in:


So the green dot is now at the top, with the rest rotated 45° from their previous locations. Up tomorrow: fiddling with the revolution of that light marker.


Day #419

Friday, June 15, 2012

Bump Maps for CubicVR.js with GIMP

‹prev | My Chain | next›

Last night I investigated various properties of textures in CubicVR.js. I am looking at the "image" properties—the properties like color, bump, and normal that can be represented with 256x256 pixel images. I found the combination of bump and normal to be the most interesting.

Bump mapping maps a surface depth to the depth in the picture. Black in the image should represent depth. White represents height. Shades of grey are somewhere in between. In combination with normal mapping, this can produce some fairly realistic looking surface features.

To explore more, I install the normalmap plugin for GIMP. After downloading the source code and extracting, I am almost ready to install.

I already have GIMP installed on my machine, but I need to install some dependecies:
sudo apt-get install pkg-config
sudo apt-get install libghc6-gtkglext-dev
sudo apt-get install libgimp2.0-dev
sudo apt-get install glew-utils
sudo apt-get install libglew1.6
sudo apt-get install libglew1.6-dev
After that, I can make and install the plugin:
make
make install
With that, I take a black dot on a 256x256 image:


And run it through filters -> map -> normal map, which results in:


Inserting that into my material from last night, I get:


Which is not bad. I had attempted to build something like that from hand, but have to admit that the normalmap plugin make this much, much easier.

Day #418

Thursday, June 14, 2012

Texture Grab-bag in CubicVR.js

‹prev | My Chain | next›

I got my damn sphere working last night. It took quite a while and turned out to be no more than an image that was 200 pixels when it needed to be 256 pixels. I am tempted to move along to other aspects of Gladius and CubicVR.js, but first I would like to take a closer look at some of the material texture properties.

In the "procedural" mesh (it's loaded from a proc() function), I am currently only specifying a color image:
function proc( options ) {
  return {
    textures: {
      color: '/images/rygb_256.png',
    }
  };
}
By virtue of the mesh, that image, with red, yellow, green and blue dots in the corners, wraps a couple of times in each direction, resulting in:


The CubicVR.js sample includes three additional texture attributes: normal, bump, and envsphere. With a different color attribute as well the texture looks something like:
    textures: {
      color: "/images/cubicvr_js/2576-diffuse.jpg",
      normal: "/images/cubicvr_js/2576-normal.jpg",
      bump: "/images/cubicvr_js/2576-bump.jpg",
      envsphere: "/images/cubicvr_js/fract_reflections.jpg"
    }
And results in a pretty impressive looking image:


A quick inspection of the images reveals that they are 256 pixels:
➜  cubicvr_js git:(master) ✗ identify 2576-* fract_reflections.jpg 
2576-bump.jpg JPEG 256x256 256x256+0+0 8-bit DirectClass 15.1KB 0.000u 0:00.000
2576-diffuse.jpg[1] JPEG 256x256 256x256+0+0 8-bit DirectClass 23.7KB 0.000u 0:00.000
2576-normal.jpg[2] JPEG 256x256 256x256+0+0 8-bit DirectClass 20.1KB 0.000u 0:00.000
fract_reflections.jpg[3] JPEG 256x256 256x256+0+0 8-bit DirectClass 41.4KB 0.000u 0:00.009
So that seems a magic number for CubicVR.js

Anyhow, what do each of these images do?

To find out, I apply them each, in turn, to my RYGB dotted version of the sphere. First up is the "normal" image:


When applied thusly:
    textures: {
      color: '/images/rygb_256.png',
      normal: "/images/cubicvr_js/2576-normal.jpg"
    }
The result is:


Interesting. I am not quite sure how that works. My initial guess would be that the color indicates the direction of the normal at any given spot. For instance, purple indicates the normal is not pointing directly out of the screen, rather it points down at a 45° angle or so. Similarly light bluish-green points out and up at a 45° angle. That is just conjecture. I will need to investigate further.

Next up is the bump texture:


Removing the normal texture and adding the bump texture (bump: "/images/cubicvr_js/2576-bump.jpg"), I find:


It has absolutely no effect at all.

Perhaps if I apply the bump and the normal texture together?


Compare that without the bump:


Interesting. Without the bump the texture looks recessed into the sphere. With the bump, the edges of the texture seem to stand up from the rest of the sphere surface. It is a little hard to be sure because the position of the revolving light source (to the right) is hard to reproduce for a screenshot, but that seems to be what is happening.

Last up is the weirdly named "envsphere" attribute. Not surprisingly, this is related to spheres and how reflections look on round shapes. The image used by CubicVR.js for this is an amorphous cloud:


Adding this to my beach ball, I get what looks like cloudy skies reflected off of the surface:


That was interesting stuff all around. It was a bit tedious applying these things and taking a screen shot, but well worth the effort—I think I have a better understanding of this now. I do think the color aspect of the bump maps warrants a closer look, but that is something for another day.

Day #417